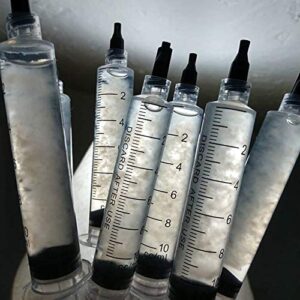
Welcome to our comprehensive tutorial on making liquid culture for mushroom growing! Whether you’re a seasoned mycologist or a budding mushroom enthusiast, understanding the art of liquid culture is a crucial step in your cultivation journey. This tutorial is designed to demystify the process, guiding you through each step with precision and clarity.
Liquid culture is the cornerstone of successful mushroom cultivation. It involves nurturing a mixture of nutrients and water, inoculated with mushroom spores or mycelium, to create a rich, living broth. This broth serves as an accelerated starting point for mushroom growth, allowing for faster colonization compared to traditional spore inoculation methods.
In this guide, we’ll explore the essentials of liquid culture preparation, from choosing the right ingredients to maintaining the perfect environment for your culture to thrive. We’ll cover the importance of sterilization, the intricacies of inoculation, and how to store and use your liquid culture effectively.
With detailed instructions and practical tips, this tutorial is your stepping stone to mastering liquid culture preparation, setting you up for a successful and rewarding mushroom growing experience. Let’s embark on this exciting journey together, unlocking the potential of liquid culture in mushroom cultivation!
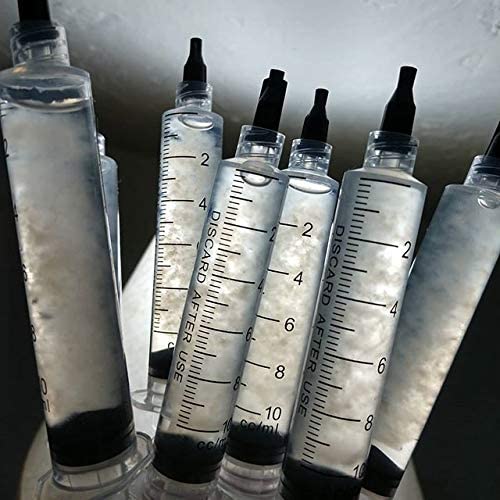
What Is Liquid Culture?
Liquid culture is a vital component in the world of mushroom cultivation, serving as a highly efficient method for propagating fungi. But what exactly is it, and why is it so important for mushroom growers?
At its core, liquid culture is a nutrient-rich solution that fosters the growth of mushroom mycelium – the vegetative part of the fungus. This solution typically consists of water mixed with various nutrients, such as sugars (like dextrose or malt extract), which provide the essential food source for the mycelium to thrive.
The beauty of liquid culture lies in its ability to accelerate mushroom growth. Unlike spore syringes, which require time for spores to germinate and develop into mycelium, liquid culture already contains this active mycelial growth. When added to a substrate – the material on which mushrooms grow – the mycelium in the liquid culture can immediately start colonizing, significantly speeding up the mushroom cultivation process.
Another advantage of liquid culture is its ability to expand mushroom strains. A small amount of liquid culture can be used to inoculate a large volume of substrate, making it a cost-effective and efficient way to grow mushrooms, especially for larger-scale operations.
Using liquid culture also reduces the risk of contamination, a common challenge in mushroom cultivation. Since the mycelium in the liquid culture is already established and actively growing, it’s less vulnerable to contaminants compared to spores, which are more susceptible during their germination phase.
In summary, liquid culture is an invaluable tool for mushroom cultivators. It provides a quick and effective means of propagating mycelium, offering faster colonization times, scalability, and reduced contamination risks. Whether you’re a hobbyist or a commercial grower, mastering liquid culture techniques can greatly enhance the efficiency and success of your mushroom growing endeavors.
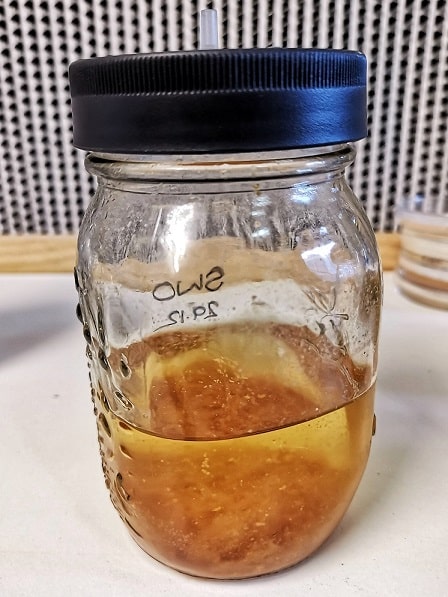
Making Liquid Culture: An Overview
Welcome, mycology enthusiasts, to our in-depth journey into the realm of liquid culture, a cornerstone of mushroom cultivation. We’re about to navigate through a concise, step-by-step guide to creating your very own liquid culture. Let’s embark on this exciting fungal adventure!
Choose the Right Strain: Selecting the appropriate mushroom strain is crucial. Opt for a strain renowned for its robust growth and vitality – think of it as the champion runner of the mushroom world.
Prepare Your Culture Medium: Mix a nutrient-rich solution to nourish your mycelium. Common choices include dextrose, malt extract, or honey, each dissolved in distilled water to create the perfect growth medium.
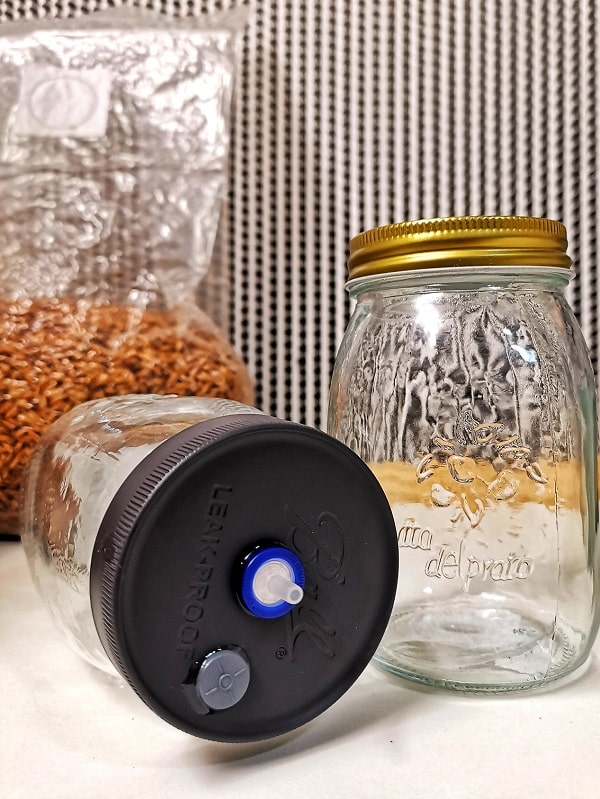
Sterilization is Key: Transfer your solution into a mason jar, fitted with a self-healing injection port and a gas exchange filter. Sterilize the mixture by pressure cooking, ensuring an environment free from contaminants. Remember, in mushroom cultivation, cleanliness is paramount.
Inoculate Your Culture: After cooling, introduce spores or mycelium from a healthy culture into your sterile liquid medium. This step kickstarts the mycelial growth – feel free to offer some words of encouragement to your culture for good measure.
Gently Mix: Shake the jar softly to evenly distribute the mycelium. Imagine yourself as a master mixologist, expertly preparing the most important concoction for your mushrooms.
Patience During Incubation: Place the jar in a warm, dark space and allow the mycelium to colonize the liquid. Patience is essential here, as mycelium grows at its own pace.
Ready for Use: When the liquid turns cloudy with mycelium growth, your culture is ready to use. This liquid can now be used to inoculate your mushroom substrate, marking the start of an exciting growth phase.
And that’s a wrap on the essentials of liquid culture preparation! Each of these steps can be expanded upon for more detailed insight, so stay with us as we delve deeper into each part of the process. We’re just beginning to uncover the intricate world of liquid culture in mushroom cultivation. Stay tuned for more detailed explorations into each step of this fascinating process!
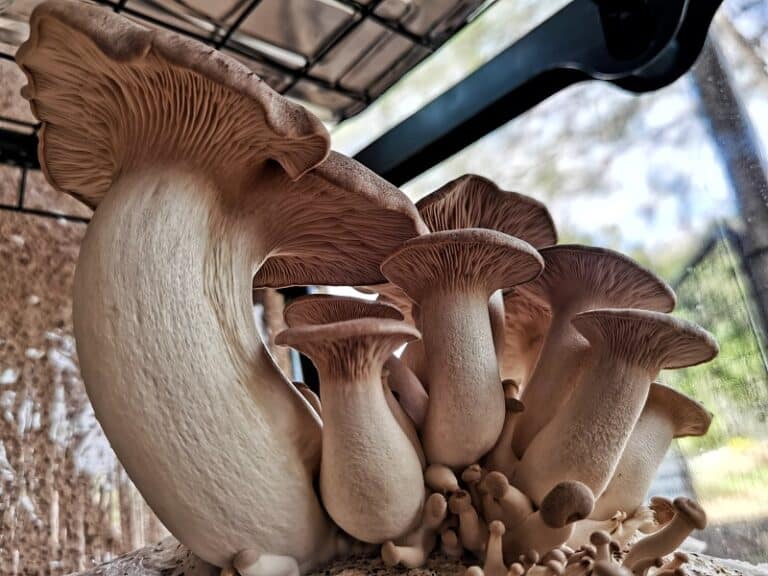
Mushroom Liquid Culture Recipe
In this tutorial, we will guide you through the process of creating a 4% carbohydrate broth liquid culture, specifically tailored for mushroom cultivation. This particular formulation is selected for its ideal nutrient balance, conducive to vigorous and healthy mycelial growth.
For your convenience and to ensure a smooth experience, we have provided links to all the necessary materials below. These resources will fully equip you to craft a successful mushroom liquid culture in the comfort of your own home.
Adhering closely to the process is critical. Not only does this ensure the successful cultivation of your mushrooms, but it also upholds safe and hygienic practices, which are paramount in any form of cultivation.
Here’s what you’ll need:
- 1L water
- 40g light malt extract.
- 1g brewers yeast (optional)
- Magnetic stirrer or marbles
- 4 x 16oz (500ml) mason jars.
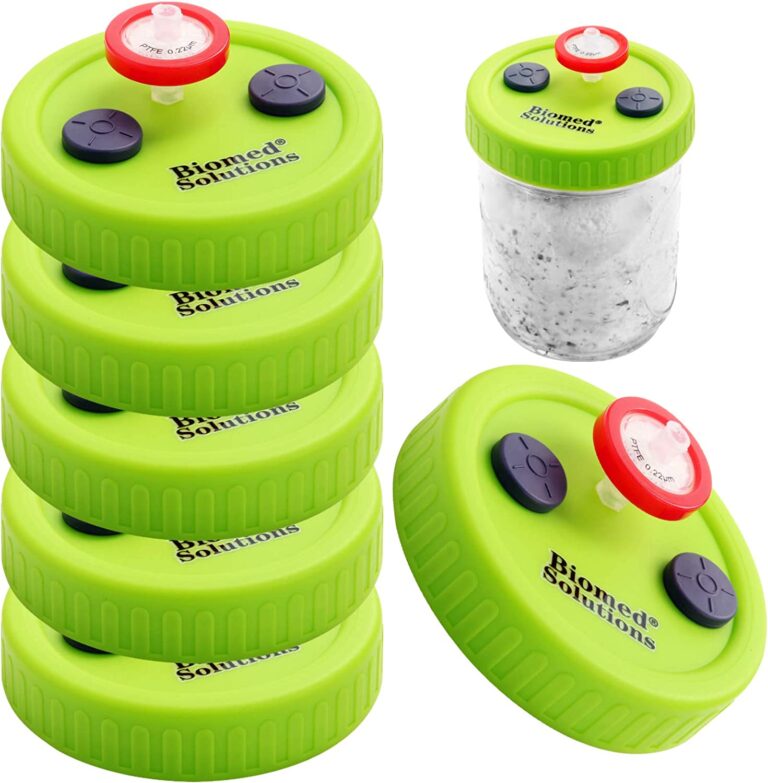
- 4 x modified lids for mushroom growing.
- Pressure Cooker
- Aluminium foil
Each item plays a crucial role in the liquid culture preparation process. By following this guide and utilizing these materials, you’ll be well on your way to cultivating a thriving mushroom culture. Let’s get started on this exciting journey of mushroom cultivation!
Optimized Design: These modified lids are engineered with the mushroom cultivator in mind. They boast filters for fresh air exchange and self-healing injection ports, providing your mycelium with the perfect balance of oxygen and protection.
Versatile Fit: Whether you’re team ‘Wide Mouth’ or ‘Regular Mouth’, these lids have got you covered. Designed to fit both types of mason jars, they ensure a snug, secure seal no matter your jar style preference.
Reusable and Sustainable: Say goodbye to single-use lids! These modified lids are built to last, providing a sustainable option for your mushroom growing needs. Simply sterilize between uses and they’re good as new.
Ideal for Grain Spawn and Liquid Culture: Looking to produce high-quality grain spawn or liquid culture? These lids offer the ideal conditions for your cultures to colonize and thrive, setting the stage for a bountiful harvest.
Simple to Use: These lids are as user-friendly as they come. The self-healing injection ports make inoculation a breeze, and the built-in filters take care of fresh air exchange without any extra effort from you.
Boosted Yields: By providing optimal growing conditions, our reusable modified lids can help enhance the productivity of your mushroom growing setup. Expect healthier mycelium and more abundant harvests!
Step 1. Measure Ingredients
As we continue our journey in creating liquid culture for mushroom cultivation, our next step is to measure and prepare the broth. This nutrient-rich broth is the foundation for mycelium growth, and its composition is crucial for promoting healthy development.
In this part of the tutorial, we’ll focus on preparing the broth using light malt extract as the primary nutrient source. Optionally, brewer’s yeast can be added to provide an extra boost of nutrients to the mycelium.
Steps for Preparing the Broth:
Measuring Water: Begin with 1 liter (or 1000 milliliters) of water. This will serve as the base of your liquid culture. It’s recommended to use distilled or purified water to minimize the risk of contaminants that could potentially impede the growth of the mycelium.
Adding Light Malt Extract: Measure out 40 grams of light malt extract. It’s important to use a digital kitchen scale for precise measurement. Light malt extract is a preferred carbohydrate source for mycelium and will provide the necessary energy for its growth.
Incorporating Brewer’s Yeast (Optional): If you choose to add brewer’s yeast, measure out 1 gram. Adding brewer’s yeast can offer an additional nutrient boost, fostering more vigorous mycelial growth. As with the malt extract, use a digital scale to ensure accuracy.
Accuracy in measuring these components is crucial. The correct proportions ensure that your mycelium has the ideal nutrient balance for healthy and robust growth. By following these measurements carefully, you’ll create a conducive environment for your mushroom culture to thrive.
Step 2. Bottle & Cover
Having prepared our liquid culture broth, we’re now ready to fill our mason jars or media bottles. This step is vital in creating an effective environment for mycelium growth. We will also add either a magnetic stir rod or a glass marble to each container. These will play a crucial role in breaking apart and distributing the mycelium later in the process.
Steps for Filling Containers:
2.1. Prepare Your Containers:
Ensure that your mason jars or media bottles are thoroughly clean and dry. Each container serves as a mini incubator for your mycelium, so maintaining cleanliness is imperative. This recipe typically suffices for 3-4 standard mason jars or 2 larger media bottles, depending on their size.
2.2. Insert Stir Rod or Glass Marble:
Place a magnetic stir rod or a small, sterile glass marble into each jar. These items are essential for agitating the liquid culture, which helps in evenly distributing the mycelium.
2.3. Pour in the Broth:
Carefully distribute your liquid culture broth into each jar, filling them to about halfway. It’s important to leave enough space for the mycelium to expand and grow.
2.4. Seal Your Containers:
Close each jar with a specialized lid that has a self-healing injection port and a gas exchange filter. These lids are designed to facilitate syringe inoculation and allow necessary gas exchange, while preventing contamination.
2.5. Final Check:
Verify that each lid is tightly sealed. This is crucial for maintaining sterility and preventing contamination during the upcoming pressure cooking step.
Patience and precision are key in this phase. Properly setting up your jars creates the optimal conditions for your mycelium to thrive. Coming up next, we’ll delve into the sterilization process, a critical step in ensuring the success of your liquid culture. Join us as we continue our exploration into the fascinating process of mushroom cultivation!
Step 3. Sterilise
Sterilizing your mason jars or media bottles filled with liquid culture broth is a crucial step in mushroom cultivation. Proper sterilization ensures that potential contaminants are eliminated, thereby preventing the growth of harmful bacteria or mold and ensuring a successful mycelium development. Here’s a detailed guide on how to sterilize your containers:
3.1. Prepare Your Pressure Cooker:
Before starting, place a rack or a folded cloth at the bottom of your pressure cooker. This layer acts as a buffer, protecting the jars from direct heat, which could cause cracking.
3.2. Load Your Jars:
Carefully place your filled and sealed jars into the pressure cooker. Arrange them so that they are spaced evenly apart and not touching each other or the sides of the cooker. This setup ensures uniform heat distribution during the sterilization process.
3.3. Add Water:
Pour water into the cooker until it’s about 1 inch deep around the jars. The water is essential for creating steam, which plays a key role in the sterilization process.
3.4. Secure the Lid:
Close the lid of your pressure cooker as per the manufacturer’s instructions. Make sure the pressure valve is properly closed or covered, depending on the design of your cooker.
3.5. Heat and Pressurize:
Turn the heat to high and bring the pressure cooker up to 15 psi (pounds per square inch). Once this pressure is reached, lower the heat but maintain it at a level that keeps the pressure steady at 15 psi.
3.6. Sterilize:
Keep the pressure constant at 15 psi for 30 minutes. This duration is necessary to ensure complete sterilization of the liquid culture broth. Regularly monitor the pressure cooker during this time for safety and to maintain consistent pressure.
3.7. Cool Down:
After sterilization, turn off the heat and allow the pressure cooker to cool down naturally. Avoid trying to quicken this process by opening the pressure valve or removing the lid, as sudden temperature or pressure changes can cause the jars to break.
3.8. Unloading:
Once the pressure cooker has cooled completely, carefully remove the lid. Using jar tongs or oven mitts, gently take out the jars and set them aside to cool down completely.
Safety is of utmost importance in this step. Always adhere to the manufacturer’s guidelines for your pressure cooker and never attempt to open it while it’s still pressurized.
Coming up next, we will explore the inoculation process, where you’ll introduce mushroom spores or mycelium into your now sterile liquid cultures. Stay tuned for this crucial next step in mushroom cultivation!
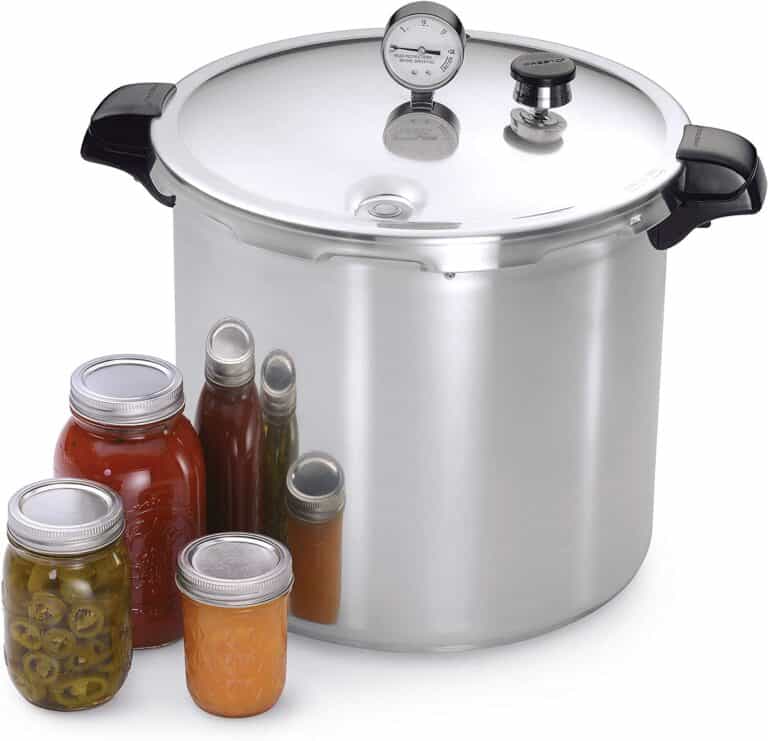
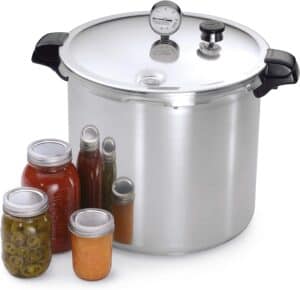
Unlock the full potential of your mushroom cultivation with our Presto 23qt Pressure Canner. This rugged, high-capacity workhorse is just the tool you need for efficient, reliable sterilization of your substrates.
Large Capacity: With a robust 23-quart capacity, our Presto Pressure Canner can handle larger loads, helping you prepare multiple jars of substrate in one go. Now, that’s what we call mushroom efficiency!
Unmatched Sterilization: Sterilization is crucial in mushroom cultivation to ward off contaminants. Our pressure canner ensures thorough, high-temperature sterilization, creating an immaculate environment for your mycelium to thrive.
Built to Last: Durability is the name of the game with the Presto Pressure Canner. Made with high-grade materials, it’s designed to withstand the test of time, serving your mushroom cultivation needs for years to come.
User-Friendly Design: It’s not just powerful, it’s also easy to use! With a simple, intuitive design, even beginners can quickly get to grips with operating our Presto Pressure Canner.
Safety Features: Your safety is paramount to us. Equipped with a pressure dial gauge for precise pressure control and a locking lid system, the Presto Pressure Canner prioritizes safe operation.
Boost your mushroom cultivation efforts with the Presto 23qt Pressure Canner – because when it comes to successful sterilization, we believe in no half measures!
Step 4. Inoculate with Agar or Liquid Culture
Inoculation is the thrilling phase where we introduce our chosen mushroom strain into the sterile liquid culture broth, setting the stage for mycelium growth. This process can be done using either a liquid culture syringe or mycelium grown on agar. Let’s dive into the steps:
4.1. Prepare Your Inoculum:
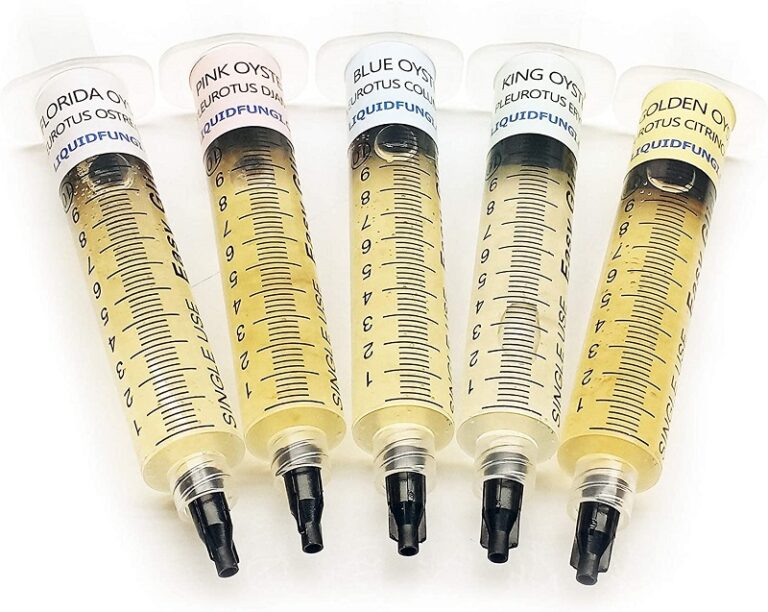
- Using a Liquid Culture Syringe: Shake the syringe well to evenly distribute the mycelium within the liquid.
- Using Mycelium on Agar: With a sterilized scalpel, cut a small piece of the mycelium grown on agar, about the size of a grain of rice.
4.2. Flame Sterilize Your Instrument:
- Whether using a needle (for the syringe) or a scalpel (for agar transfer), sterilize it by holding it in a flame (like from a torch or alcohol lamp) until it glows red. This ensures any potential contaminants are eliminated. Allow it to cool down before proceeding to the next step.
4.3. Inoculate Your Broth:
- For Syringe Use: Insert the needle through the self-healing injection port of your jar or bottle and release about 1-2ml of the liquid culture.
- For Agar Use: Carefully open the container’s lid just enough to slide the piece of agar inside and then reseal it promptly. Speed is crucial to reduce contamination risks.
4.4. Distribute the Mycelium:
- After inoculation, gently shake the jar to disperse the mycelium evenly throughout the liquid culture broth.
4.5. Incubate:
- Place the jar in a dark, undisturbed location at a temperature suitable for your mushroom species. Room temperature is generally sufficient for most types, but verify the specific needs of your selected strain.
Maintaining sterility throughout this process is essential to prevent contamination. Always work in a clean environment and ensure that all your tools are thoroughly sterilized.
In the following days, you should begin to observe mycelium growth within your jars. The next segment of our tutorial will cover what to expect as your mycelium develops and guide you through the subsequent stages of your mushroom cultivation journey.
Step 5. Agitate & Oxygenate
As your inoculated liquid culture starts exhibiting mycelium growth, it’s crucial to regularly agitate the mixture. This process breaks up the developing mycelial mass and disperses it evenly through the liquid medium, which is essential for efficient nutrient absorption. Additionally, a well-distributed mycelium makes the liquid culture more manageable when drawing it into a syringe for substrate inoculation.
Steps to Agitate Your Developing Liquid Culture:
5.1. Monitor for Mycelium Growth:
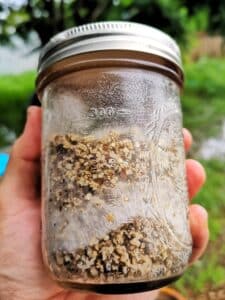
Regularly observe your liquid culture. The appearance of cloudy white formations within the liquid indicates the growth of mycelium. Once you notice these signs, it’s time to begin agitation.
5.2. Method of Agitation:
- For Jars with Glass Marbles: Ensure the lid is tightly secured. Shake the jar vigorously to break up and distribute the mycelium throughout the liquid. It’s important to be firm but gentle to avoid damaging the jar.
- For Jars with Magnetic Stir Bars: Place the jar on a magnetic stirrer and activate it at a moderate speed. This will create a vortex inside the jar, effectively breaking apart the mycelial mass and ensuring even distribution.
5.3. Frequency of Agitation:
Aim to agitate your liquid culture at least once daily. Consistent agitation is key to maintaining an even distribution of mycelium, which in turn supports healthy and robust growth.
Additional Tips:
- When shaking jars, handle them with care to avoid breakage.
- If using a magnetic stirrer, adjust the speed as needed to achieve effective agitation without causing too much turbulence.
Regular agitation is a simple yet vital part of the process, ensuring your liquid culture develops optimally. This routine maintenance of your liquid culture will set you up for a successful transition to inoculating your mushroom substrates.
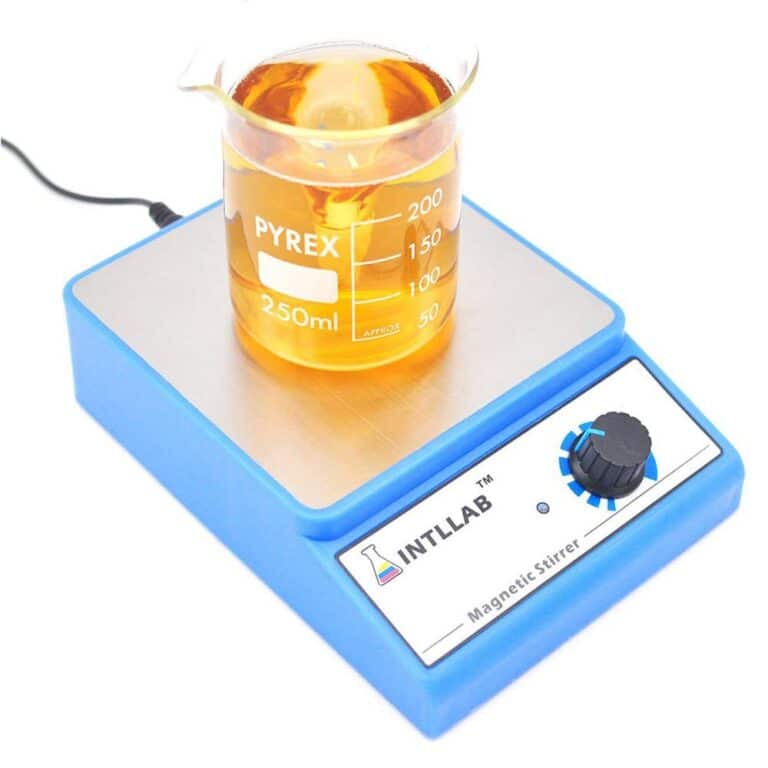
Unleash the potential of your liquid cultures with our top-tier Magnetic Stirrer! Precision-engineered for the demands of gourmet mushroom cultivation, this stirrer is a must-have tool for any serious mycologist.
Designed for functionality and durability, our Magnetic Stirrer ensures a smooth, consistent vortex that gently but efficiently breaks apart mycelial masses. This promotes even distribution of mycelium throughout your liquid culture, enhancing nutrient uptake and ensuring robust, vigorous growth.
Our Magnetic Stirrer is not only easy to use, but it’s also a clean, hands-off way to agitate your cultures, reducing the risk of contamination. With adjustable stirring speeds, it offers you complete control, catering to a wide range of fungal species and cultivation requirements.
Say goodbye to the manual shaking and say hello to the ease and efficiency of our Magnetic Stirrer. Harness the power of magnetism to propel your mushroom cultivation to new heights. This isn’t just a tool; it’s your secret weapon in the world of mushroom cultivation. Order now, and stir your way to fungal success!
Step 6. Using The Liquid Culture
With your liquid culture fully colonized and teeming with mycelium, it’s now time to initiate the inoculation process. This crucial step involves introducing the mycelium into your chosen substrate—the nurturing ground where your mushrooms will flourish. Let’s walk through the inoculation process:
6.1. Preparing Your Work Area:
Cleanliness is paramount in this phase. Choose a clean workspace and sterilize all surfaces with either a 10% bleach solution or 70% isopropyl alcohol. Have your substrate jars or bags within easy reach, and ensure your liquid culture syringe is sterile and ready for use.
6.2. Agitate the Liquid Culture:
Give your liquid culture jar a good shake to evenly distribute the mycelium. The magnetic stir rod or glass marble added earlier now plays a vital role in breaking up the mycelium, ensuring a homogenous suspension for easy syringe withdrawal.
6.3. Loading the Syringe:
Carefully insert your sterilized syringe into the jar’s self-healing injection port and draw the mycelium-laden liquid into the syringe. Aim for gentle aspiration to avoid air bubbles, which can lead to clumping of the spores.
6.4. Inoculating the Substrate:
Now, inject the mycelium suspension into your substrate containers through their injection ports. A general rule is to use about 1-2 milliliters of liquid culture for each pound of substrate.
6.5. Sealing and Storing:
After inoculation, seal your substrate containers securely. Store them in a spot that’s clean and warm, away from direct sunlight, to encourage colonization.
6.6. Monitoring Progress:
Regularly check on your substrate for colonization signs. Healthy mycelium growth is indicated by white, web-like formations. Be on the lookout for any unusual colors like green or black, as these can signal contamination.
Congratulations! You’ve successfully reached a significant milestone in mushroom cultivation. Over the next few weeks, your patience and care will be rewarded as you observe the growth of your mushrooms.
Keep an eye out for our next tutorials on mushroom care and harvesting. The journey into the realm of mushroom cultivation continues, filled with exciting possibilities and learning opportunities!

