Welcome to our detailed tutorial on preparing agar for mushroom cultivation, a fundamental skill for both novice and experienced mycologists. In this guide, we will walk you through the process of making agar plates, a crucial tool in the propagation and study of mushrooms. Agar, a gelatinous substance derived from seaweed, serves as an ideal growth medium for fungal mycelium, offering a sterile and nutrient-rich environment for development.
This step-by-step tutorial is designed to help you master the art of preparing agar for growing a variety of mushroom species, including gourmet, medicinal, and exotic types. We’ll cover essential topics such as sterilization techniques, the selection of proper nutrients, and the incorporation of agar into petri dishes or jars. Our guide is tailored to provide clear instructions and tips to ensure successful mycelium growth and minimize contamination risks.
Whether you’re a hobbyist looking to cultivate mushrooms at home, a professional mycologist, or someone interested in the science of mycology, understanding how to properly prepare and use agar is a key skill. By the end of this tutorial, you’ll have a strong foundation in creating your own agar cultures for mushroom cultivation, leading to healthier and more vigorous mycelial growth.
Let’s get started on this exciting journey into the world of mushroom cultivation with agar preparation!
What Is Agar?
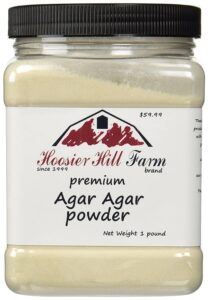
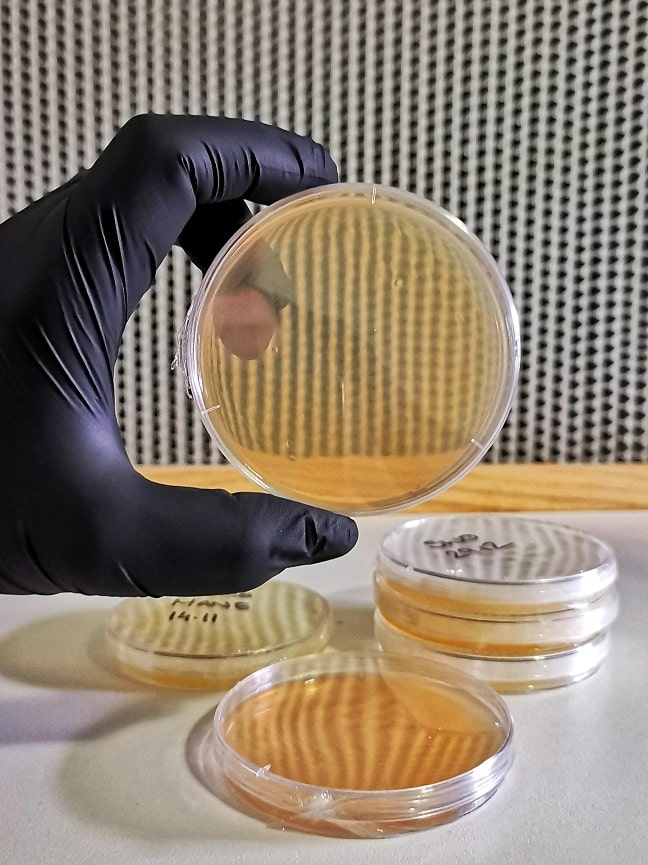
Agar, a fundamental component in the world of mushroom cultivation and mycology, is a gelatin-like substance that plays a crucial role in the growth and study of fungi. Originating from seaweed, specifically a group known as red algae, agar serves as a versatile and vital growth medium in the laboratory.
The use of agar in mushroom cultivation is pivotal due to its unique properties. It is solid at room temperature, creating a stable and nutrient-rich environment for the growth of mycelium, the vegetative part of fungi. Agar’s transparency is another key feature, allowing cultivators and researchers to observe mycelial growth and detect any potential contamination visually.
In mushroom cultivation, agar is often infused with a variety of nutrients, such as malt extract or yeast extract, to promote healthy fungal growth. This enriched agar is then poured into petri dishes or jars, where it solidifies to form a growth medium. Spores or mycelium fragments are introduced onto this agar surface, where they germinate and expand, forming a visible network of mycelium.
Agar’s non-nutrient properties also contribute to its widespread use. Unlike other growth mediums that might be nutritious for bacteria and other potential contaminants, agar primarily supports fungal growth. This characteristic makes it an invaluable tool for isolating and maintaining pure mushroom cultures, essential for both research and cultivation.
Overall, agar is a cornerstone in the field of mycology, offering a controlled and observable environment for growing and studying mushrooms. Its versatility, coupled with its ability to provide a contaminant-resistant medium, makes it an indispensable resource for both amateur and professional mycologists.
Why Use Agar To Grow Mushrooms?
You’re absolutely right if you’ve come to realize that agar, far from being a mere seaweed derivative, is indeed the unsung hero, the rockstar of mushroom cultivation. This gelatinous substance is more than just a medium; it’s the backbone of successful mycology endeavors.
Agar is to mushrooms what fertile soil is to a flourishing garden. It provides a nutrient-rich foundation where the mycelium, the root-like structure of mushrooms, can thrive. This is akin to rolling out a red carpet for mushroom growth, offering a premium stage for these fungal celebrities to perform their growth dance.
In the world of mushroom cultivation, ‘clean cultures’ are paramount. This term refers to cultures that are pure and uncontaminated, hosting only the desired mushroom strains, free from microbial gatecrashers like bacteria or other fungi. Imagine hosting an exclusive, high-end mushroom gala where only the crème de la crème of fungi are invited – this is what agar facilitates.
Creating clean cultures on agar is akin to curating an exclusive guest list for a VIP event. We introduce a tiny piece of mushroom tissue or a spore print onto the agar, which then becomes a luxurious playground for the mycelium to sprawl out. As it spreads, we can scrutinize for any contamination signs, isolating and transferring clean sections to cultivate new, uncontaminated cultures.
But agar’s role doesn’t stop at matchmaking in the fungal realm. It also serves as a time capsule, ideal for preserving mycelial cultures for future use. Once a culture has fully colonized the agar surface, it can be stored away in a cool, dark place, retaining its viability for months or even years. This feature is a boon for cultivators who wish to safeguard the genetics of particularly prized mushroom specimens for future cultivation or experimentation.
Agar is both a meticulous detective and a preserver in our mushroom adventures, enabling us to maintain pure cultures and store our most valued fungal genetics. It’s an exciting tool that turns every mycologist into a bit of a Sherlock Holmes or an Indiana Jones in the realm of gourmet mushroom cultivation. And now, prepare yourself as we delve into the nitty-gritty of preparing agar — it’s going to be a thrilling journey, a true “gel” of an adventure in mushroom cultivation!
Is A Laminar Flow Hood Necessary?
When delving into the world of mushroom cultivation, particularly at a more advanced or commercial level, the question of whether to invest in a laminar flow hood often arises. Understanding the role and importance of this equipment is crucial in deciding if it’s a necessary addition to your mycological toolkit.
A laminar flow hood creates a sterile environment by filtering air through a HEPA (High-Efficiency Particulate Air) filter, ejecting a continuous stream of clean air. This setup is essential for tasks that require a high level of sterility, such as inoculating substrates, making grain spawn, or transferring mycelium to new media. The clean air flow significantly reduces the risk of contamination, a common and frustrating hurdle in mushroom cultivation.
For hobbyists or small-scale growers, a laminar flow hood may not be an absolute necessity. Many successful cultivations can be achieved in a still-air box or a carefully cleaned and maintained workspace. However, for those looking to scale up their operations, increase production, or engage in more sophisticated mycological experiments, a laminar flow hood becomes an invaluable asset. It not only improves success rates but also enhances the scope of what you can achieve in your cultivation endeavors.
It’s worth considering the investment in a laminar flow hood against the scale and seriousness of your mushroom cultivation. For casual growers, the cost and space required for a laminar flow hood might not justify its benefits. But for those delving into larger-scale or commercial cultivation, or those deeply invested in the science of mycology, a laminar flow hood can be a game-changer, elevating your cultivation capabilities to professional standards.
While a laminar flow hood is not strictly necessary for all mushroom cultivators, its value becomes increasingly significant as your cultivation ambitions grow. It’s a matter of balancing your current needs, future aspirations, and the level of investment you’re willing to make in your mycological journey.
What You'll Need
The role of agar preparation stands out as both an art and a science. The creation of agar plates is a meticulous process that demands precision and a strict adherence to cleanliness to be successful. In our upcoming tutorial, we aim to guide you through this process with detailed, step-by-step instructions, catering to both experienced mycologists and those new to the world of mushroom cultivation.
Our comprehensive guide will walk you through the entire process of preparing agar for growing mushrooms. The tutorial is designed to be clear and instructive, ensuring that you can confidently replicate each step in your own mycological practices.
Before beginning, it’s important to note that preparing agar requires specific materials and tools. To help you in this endeavor, we have compiled a list of the necessary items, along with links to trusted sources. These are the same resources we use at Urban Spore, ensuring quality and reliability. Here’s what you’ll need to get started:
- 10 grams agar
- 10 grams light malt extract
- 500 ml water
- 20 petri dishes
- Media bottle or jar with hole in lid (Narrow neck passata bottles are great)
Gathering these materials beforehand will facilitate a smooth and effective preparation process. Our goal is to help you become adept at preparing agar, an essential skill in the cultivation of mushrooms.
Stay tuned for our tutorial, and prepare to embark on a rewarding journey into agar preparation. With the right guidance and a bit of practice, you’ll soon be well-equipped to advance your mushroom cultivation skills.
Absolutely, let’s delve into the step-by-step procedure for preparing agar, beginning with the all-important task of measuring our ingredients. While our typical tone here is light and jovial, remember that precision is paramount in this process. Our mushrooms are picky diners, and we need to ensure they get the right nutrients in the right proportions.
Step 1. Measuring The Ingredients
First, gather your ingredients. For our agar recipe, you’ll need the following:
– 10 grams of agar
– 10 grams of light malt extract
– 500 milliliters of boiling water
Just as a seasoned chef values the precision of their ingredients, we, too, must be meticulous in our measurements. Misjudging quantities can lead to suboptimal agar, which could hinder mycelium growth or invite contaminants to your fungal feast.
So, bring out your trusty digital scales – no estimating or eyeballing here, folks. It’s time for scientific accuracy.
1.1. Start with the agar. Place a clean, dry dish on the scales and tare it, so the scales read zero with the dish in place. Slowly add the agar until your scale reads exactly 10 grams.
1.2. Repeat the process with the light malt extract. Remember, cleanliness is crucial. Make sure to clean your dish between measurements to avoid cross-contamination.
1.3. Lastly, measure the boiling water. As we’re dealing with a liquid, it’s best to use a measuring jug for this step. Ensure the jug is on a flat surface, and you’re at eye level for the most accurate reading.
With your ingredients accurately measured, you’ve taken your first crucial step in agar preparation. This trifecta of ingredients forms the basis of your fungal banquet. Next, we’ll cover how to combine these elements into the perfect petri dish delicacy, but for now, congratulate yourself – you’re well on your way in the agar preparation journey. Stay tuned for the next steps, and remember – accuracy is your best friend in this process!
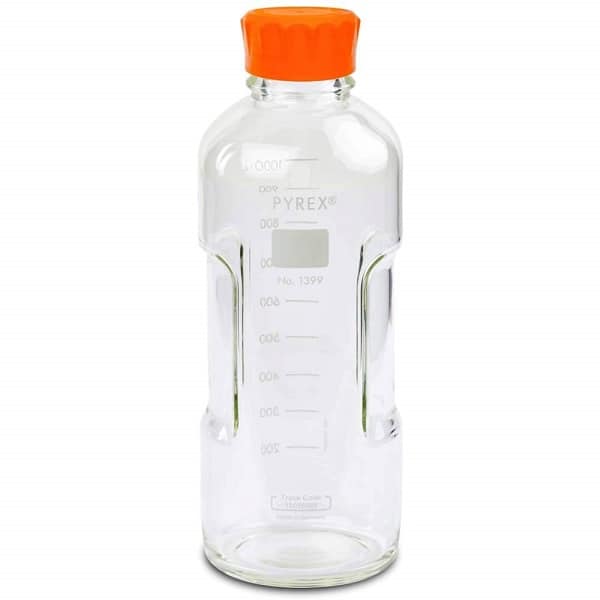
Prepare for your mycology magic to soar to new heights with our 500ml Pyrex Media Bottle – the trusted accomplice for any mushroom maven keen on crafting the perfect agar plates.
Designed for the discerning cultivator, this high-quality, heat-resistant bottle is your ticket to creating pristine, nutrient-rich agar plates for your gourmet mushroom cultures. With a generous 500ml capacity, you have ample space for a bountiful brew of agar mixture. Its ergonomic design ensures an easy and precise pour, while the sturdy, heatproof Pyrex material allows for safe sterilization, granting you a superb sidekick in your fight against potential contaminants.
The bottle’s foolproof seal prevents any sneaky spores or bacteria from crashing your mushroom party. Meanwhile, its transparent glass allows for easy monitoring of your agar’s status, keeping you in the know at every stage of your fungal journey.
Whether you’re a budding mycologist or an experienced cultivator, the 500ml Pyrex Media Bottle is a must-have tool in your mushroom cultivation toolkit. Make it your go-to companion for crafting successful agar plates, and watch as your mycelium thrives in the safe, sterile environment you’ve created. Embrace the mushroom magic today – your fungi friends will thank you!
Step 2. Mixing & Pouring
Certainly, now that our ingredients are precisely measured, let’s move on to the next crucial step: creating the agar mixture and preparing it for sterilization.
Once your agar, light malt extract, and water are measured, transfer all three into a pot, making sure to use clean utensils to keep your work environment as sterile as possible.
Now comes the crucial stirring phase. Agar, like a well-written mystery novel, requires a good mix to reveal its magic. Stir the mixture vigorously to ensure that the agar and malt extract are fully dissolved in the water. This is no time for half-hearted stirring, dear cultivators. Imagine you’re trying to mix up the plot of your favorite thriller: give it a good, robust swirl until everything is well incorporated.
Once you’re confident the mixture is thoroughly combined, it’s time to distribute the fluid into your mushroom media jars or bottles. Using a ladle or pouring jug, carefully portion out the mixture, taking care to avoid spillages or splashes. Remember, in mushroom cultivation, cleanliness is king.
Fill each jar or bottle to about half or two-thirds full. This ensures you leave enough room for the mixture to simmer under pressure. Once filled, seal the jars or bottles tightly. This will protect your precious agar mixture from airborne contaminants during the upcoming sterilization process.
Step 3. Sterilize
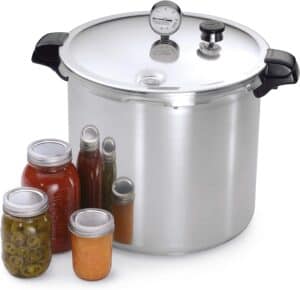
With our agar mixture diligently poured into our media bottles, it’s time to embrace our next challenge: the art of sterilization. Here, our guest of honor is none other than the trusty pressure cooker, the unsung hero in the fight against unwanted contaminants.
3.1. First things first, before we introduce our agar-filled media bottles to their hot date, ensure your pressure cooker is clean and in good working condition. Safety is paramount here, and pressure cookers, while incredibly useful, need to be treated with respect.
3.2. Now, place a steaming rack or small towel at the bottom of your pressure cooker. This layer acts as a buffer between the heat source and the glass media bottles, preventing them from cracking due to direct heat contact. It also allows for better steam circulation, ensuring an even, thorough sterilization process.
3.3. Next, carefully arrange your media bottles inside the cooker. Stand them upright and make sure they are not touching each other or the sides of the cooker. The aim is to allow steam to circulate freely between each bottle for uniform heating.
3.4. Pour water into the cooker until it reaches about a quarter to a third of the way up your media bottles. The goal here is not to submerge your bottles but to create a steamy environment within the cooker.
3.5. Once you’ve double-checked your setup, securely fasten the lid of your pressure cooker. Turn on the heat and allow the pressure to build up to 15 psi. At this pressure, maintain the heat for a full 30 minutes to ensure complete sterilization. Remember, patience is key here – we’re not just cooking dinner, we’re creating a pristine playground for our future fungi.
3.6. After the sterilization time has elapsed, switch off the heat and let the cooker depressurize naturally. Safety tip: Do not attempt to speed up this process or open the cooker while it is still pressurized.
3.7. Once fully depressurized, remove the cooker’s lid, but leave the bottles inside to cool and avoid potential contamination from airborne spores.
Well done, cultivators! You’ve just taken another significant stride in your agar preparation journey. Remember, precision and patience are your trusted allies in this process. And as always, safety first.
Step 4. Pour Agar
Once the agar mixture in the media bottles has been sterilized (usually via a pressure cooker or autoclave), we need to let it cool before we can pour our agar plates. However, timing and temperature are crucial here. If the agar mixture cools too much, it will solidify in the bottle, making it impossible to pour. On the other hand, if it’s too hot, it can warp or damage the plastic petri dishes. The Goldilocks temperature for our purpose lies around 45-55°C (113-131°F), warm enough to remain liquid but cool enough to handle and pour safely.
4.1. While waiting for your mixture to cool, take the opportunity to sanitize your workspace again and get your stack of petri dishes ready. Remember, cleanliness cannot be overstressed at this stage. Every precaution you take reduces the risk of contamination in your agar plates.
4.2. When the temperature is just right, give the bottle a gentle swirl to mix the contents thoroughly. Then, working quickly but carefully, start to pour the agar into each petri dish. You don’t need much, just enough to cover the bottom of the dish – about 15-20 milliliters per plate should suffice. As you fill each dish, secure the lid immediately to prevent exposure to potential airborne contaminants.
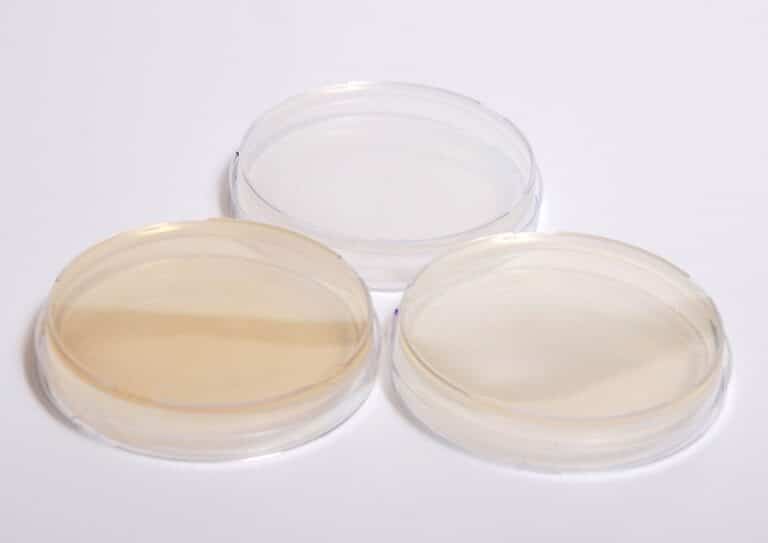
And voilà! You’ve just poured your agar plates, my dear mycologists. This is a significant milestone in your gourmet mushroom cultivation journey. Your petri dishes are now ready to be inoculated with your chosen mushroom culture, bringing you one step closer to a thriving harvest of gourmet mushrooms.
Remember to take this process slowly and steadily. With careful attention to temperature and sterile technique, you’ll soon be a master at pouring agar plates.
Step 6. Sealing with Parafilm
After pouring the agar mixture into your plates, you’ll find yourself staring at what may look like a collection of experimental pancakes. Don’t let their simple appearance fool you, dear cultivators – these plates are the nurturing nurseries for your future mushroom marvels. Hence, they demand our utmost care and attention, starting with a proper sealing process.
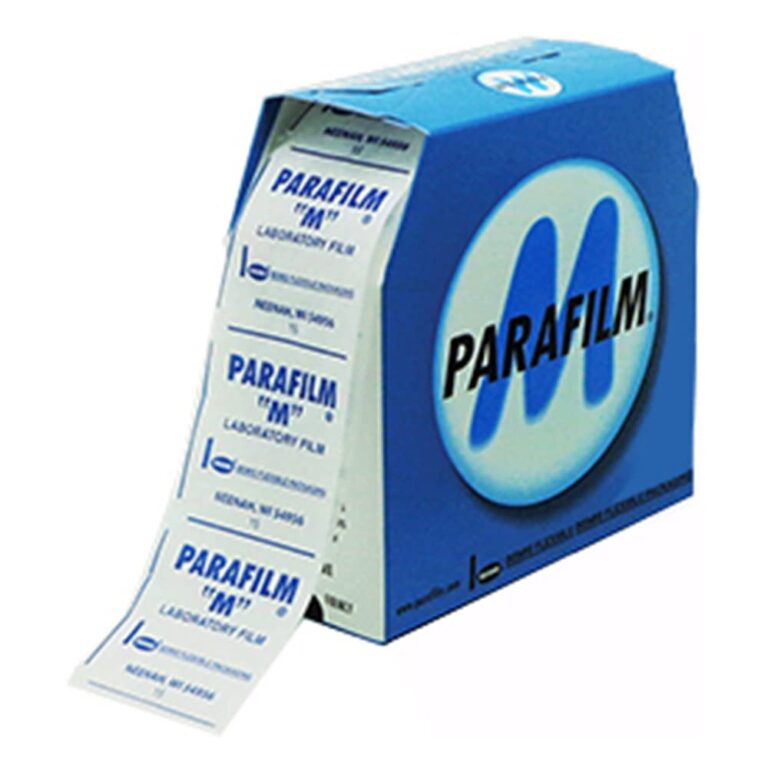
Parafilm, a highly flexible, moldable and self-sealing film, is an essential ally in this endeavor. Its sealing prowess will help shield your agar plates from the outside world, keeping those nasty contaminants at bay.
So, let’s get to it. Here’s how you seal your agar plates using parafilm:
6.1. Cut a strip of parafilm approximately twice the circumference of your agar plate. Remember to handle the parafilm with clean hands or gloves to avoid contamination.
6.2. Stretch the parafilm gently – its superpower lies in its elasticity. The film will extend to nearly double its length, providing a snug, airtight wrap around your plate.
6.3. Begin to wrap the parafilm around the circumference of your agar plate. Start at one side and work your way around, ensuring that the film adheres to itself as you go. The goal here is to create an airtight seal that safeguards your agar from any airborne invaders.
6.4. Once you’ve fully encased the plate’s circumference, press the parafilm against the plate to reinforce the seal. Voila! Your agar plate is now securely sealed and ready for future mycelial guests.
Remember, the effectiveness of the parafilm seal is integral to maintaining the purity of your agar plates, so take your time and ensure a good seal.
Parafilm for Sealing Agar Plates
Parafilm is indeed an indispensable tool in the realm of mushroom cultivation, especially when it comes to working with agar plates. Its usage brings several significant benefits that contribute to the success and efficiency of growing mushrooms. Here’s a closer look at the advantages of using Parafilm in sealing agar plates:
Airtight Seal
- Parafilm is excellent at forming a tight seal around agar plates. This airtight seal is crucial as it prevents oxygen and other environmental contaminants from entering the plate. Such containment is essential for maintaining the purity of the mushroom cultures and preventing any external factors from adversely affecting their growth.
Moisture Retention
- One of the key factors in mushroom growth on agar is maintaining the right moisture level. Parafilm excels in preserving the moisture content within the agar plates. This retention ensures that the mushrooms have a consistent and optimal growing environment, which is vital for their development.
Barrier to Contamination
- In mushroom cultivation, one of the biggest challenges is avoiding contamination. Parafilm acts as an effective physical barrier, safeguarding the agar and the developing mycelium from external contaminants. This protective measure drastically reduces the risk of infection, thereby enhancing the likelihood of a successful and healthy mushroom crop.
Convenience and Cost-Effectiveness
- Parafilm is not only efficient in its protective role but also in its ease of use. It’s simple to apply and remove, making it a practical choice for mushroom growers. Additionally, its cost-effectiveness adds to its appeal, offering a reliable solution without incurring significant expenses.
In summary, the use of Parafilm for sealing agar plates in mushroom cultivation is both a practical and effective technique. It ensures an optimal growth environment by maintaining moisture levels, providing an airtight seal, and protecting against contamination, all while being convenient and cost-efficient to use. This makes Parafilm a go-to choice for mushroom growers aiming for successful cultivation outcomes.
