Welcome to our comprehensive tutorial on using the PF Tek method for growing mushrooms at home. This guide is tailored for beginners and experts alike, diving into the intricate world of mycology. The PF Tek, short for Psilocybe Fanaticus Technique, is a widely acclaimed and popular method for cultivating mushrooms, particularly suited for growing varieties like Psilocybe cubensis.
In this step-by-step tutorial, we will cover all the essential aspects of the PF Tek method, from preparing the necessary materials and substrates to the final harvest. Our focus will be on key areas such as sterilization, inoculation, incubation, and fruiting conditions. We aim to demystify the process and make it accessible for everyone, whether you’re a mushroom cultivation enthusiast or someone curious about the art of growing mushrooms at home.
We will also delve into best practices for maintaining a sterile environment, a crucial aspect of successful mushroom cultivation. By following our guide, you will learn how to create and maintain the perfect conditions for your mycelium to thrive, leading to a successful and abundant mushroom harvest.
Join us on this fascinating journey into the world of mushroom cultivation using the PF Tek method. Whether you’re looking to grow mushrooms for culinary purposes, study, or personal interest, this tutorial will provide you with the knowledge and tools you need to get started. Let’s embark on this mycological adventure together!
What Is PF Tek?
The PF Tek, short for Psilocybe Fanaticus Technique, emerged in the late 20th century as an innovative and cost-effective method for cultivating mushrooms at home. It has significantly impacted the mushroom cultivation community since its introduction, and we’re here to distill its key aspects for you. Imagine growing gourmet mushrooms in your home, flourishing as swiftly as a viral internet video gains views.
In this engaging guide, we’ll walk you through the PF Tek process step-by-step, helping you avoid common pitfalls. By the end, you’ll be harvesting mushrooms with ease, and when asked about your success, you can charmingly reply that it’s because you’re just a fun-gi (or gal)!
So, make yourself comfortable, perhaps with some popcorn (or even popcorn mycelium for the enthusiasts), and let’s embark on this educational journey. With the PF Tek, you’ll find that there is always room for growth and improvement in the art of mushroom cultivation. Let’s get started!
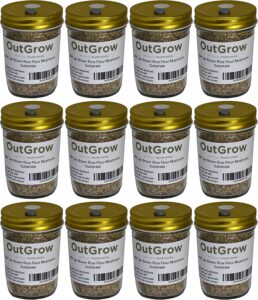
Purchasing ready-to-use brown rice flour (BRF) jars offers numerous advantages for mushroom cultivation, especially for beginners or small-scale growers:
1. Convenience: These jars are immediately ready for use, eliminating the need to prepare the substrate yourself. This saves time and simplifies the process, making mushroom cultivation more accessible.
2. Sterilization: Pre-made BRF jars are already sterilized, which significantly reduces the risk of contamination. This step is crucial for ensuring successful mushroom growth.
3. Consistency: The jars provide a standardized product in terms of composition, volume, and sterilization process. This consistency is vital as it reduces variability in growing conditions, leading to more predictable results.
4. Cost-Effectiveness: For those just starting or operating on a smaller scale, buying pre-made BRF jars can be more economical than purchasing all the individual components and equipment needed to prepare the substrate from scratch.
Opting for pre-made BRF jars simplifies the mushroom cultivation process, reduces contamination risks, and provides a consistent base for mushroom growth, making it a practical and efficient choice.
Vermiculite, often overlooked in discussions about mushroom cultivation, is actually a pivotal player in the process, much like a supporting character in a movie who quietly ensures the hero’s success. It’s not just a rock; it’s a mineral with unique properties that make it invaluable to both gardeners and mushroom growers.
This mineral undergoes a transformation when heated, a process known as exfoliation, which turns it into a lightweight, absorbent, and non-toxic material. Its versatility in various applications makes it akin to a Swiss army knife in the mineral world – understated in appearance but incredibly functional.
In mushroom cultivation, particularly in the PF Tek method, vermiculite serves multiple essential roles. Its porous nature is excellent for retaining moisture, providing the hydration that mycelium desperately needs. Additionally, it ensures proper aeration, allowing the mycelium to breathe, which is crucial for their growth.
During the preparation of BRF cakes, vermiculite is combined with brown rice flour, resulting in a substrate that is airy, moist, and perfect for mushroom spores. This mixture creates an ideal environment, likened to a luxurious accommodation for the spores, complete with all the necessary amenities for their growth.
Furthermore, a layer of dry vermiculite is added atop the BRF jars before sterilization. This layer acts as a defensive barrier, keeping harmful bacteria at bay and protecting the developing mycelium from potential contaminants. It’s as if vermiculite stands guard, ensuring the safety and purity of the cultivation environment.
In essence, vermiculite is a crucial component in the journey of mushroom cultivation, playing a role that might not be glamorous but is undeniably critical. It’s the behind-the-scenes hero, ensuring that the mycelium can thrive and eventually lead to the growth of mushrooms. So, here’s a salute to vermiculite, the uncelebrated yet indispensable rock star of the mushroom growing world!
Why Use Vermiculite for Growing Mushrooms?

If you’ve stumbled upon the term ‘BRF cake’ in the context of mushroom cultivation and are puzzled, thinking it’s a new kind of dessert, let me clear the air for you. ‘BRF cake’ is a key component in the PF Tek method of mushroom growing, and it’s quite different from your traditional baked goods.
BRF stands for Brown Rice Flour, which plays a central role in this mushroom cultivation technique. But no, we’re not venturing into the world of gluten-free baking. In the language of mushroom growers, a BRF cake is a blend of brown rice flour, vermiculite, and water. This mixture is sterilized and then inoculated with mushroom spores. Its fluffy texture and nutrient richness provide an ideal environment for the growth of baby mycelium.
Creating a BRF cake is akin to setting the stage for a romantic film where everything must be perfect. It starts with a careful mix of brown rice flour and vermiculite, followed by just the right amount of water to achieve the desired consistency. This blend is then packed into jars, topped with a dry layer of vermiculite to act as a barrier against contamination – consider this the bouncer at your BRF cake’s exclusive club.
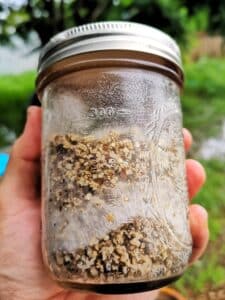
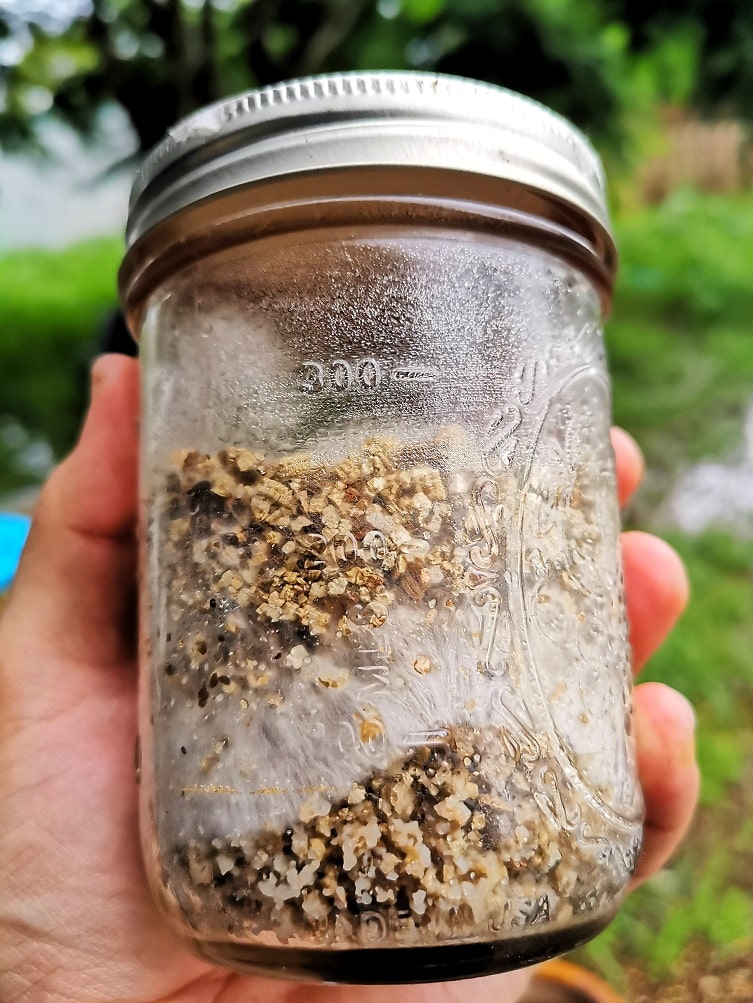
These jars undergo sterilization, transforming them into the perfect breeding grounds for spores to colonize and form extensive mycelium networks. As colonization takes place, the contents of the jar begin to solidify and resemble a cake. You’ll recognize it’s ready when it’s uniformly white with mycelium, similar to how a baked cake indicates its readiness.
So, the next time you hear ‘BRF cake’, think less of a baking challenge and more of an exciting step in mushroom cultivation. It’s about creating the perfect foundation for mushrooms to thrive, not about pleasing Mary Berry with your baking skills. And in its own way, successfully cultivating fungi using a BRF cake is as satisfying as baking the perfect cake!
What Is A BRF Cake?
The duration of the PF Tek process for mushroom cultivation is similar to the growth of a tree from a seed—it requires time and patience. The entire process typically spans about five weeks, though it can vary depending on several factors.
Week 1 – Getting Started: This initial week is crucial. You’ll be preparing your jars, mixing your substrate, and inoculating them with spores. It’s essential to maintain a clean environment during this stage to prevent any unwanted fungal guests.
Weeks 2-4 – The Waiting Game: During these weeks, the mycelium begins to colonize the jar. This period, humorously termed the ‘Don’t-Rush-the-Mush’ phase, demands patience. It’s important to resist the urge to check on the jars frequently; think of it like waiting for a surprise party to unfold.
Week 5 – The Culmination: In the final week, after complete colonization, it’s time to birth the cakes and start the fruiting process. This is when you’ll finally see your mushrooms begin to grow.
However, it’s important to remember that nature doesn’t adhere to a strict timetable. The speed of the process can be influenced by factors like ambient temperature, the quality of your spore syringe, and other environmental conditions.
So, stay calm and patient. In just over a month, you’ll be able to enjoy the rewards of your efforts, savoring the mushrooms you’ve cultivated yourself. Happy growing!
How Long Does The PF Tek Take?
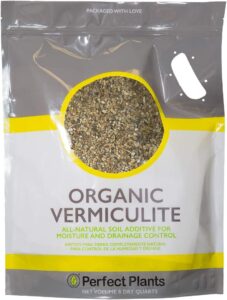
Premium Grade Quality: Our Vermiculite is sourced with the highest standards, ensuring you receive only the best.
Ideal for Mushroom Cultivation: Specifically chosen for mushroom enthusiasts, Vermiculite is the gold standard substrate additive. It’s designed to maintain moisture and provide aeration, giving your mycelium the perfect environment to fruit and flourish.
Re-Sealable Pack: Bid adieu to spillage woes! Our Vermiculite comes in a handy, re-sealable pack. Use what you need, then simply seal it back up to maintain freshness and prevent moisture loss.
Fast Shipping: Impatient to get your mushroom project rolling? We’ve got you covered with our speedy shipping! We’ll make sure your Vermiculite gets to you faster than a mushroom popping up after a rain shower.
Value for Money: Each pack of our Vermiculite offers you incredible value. A little goes a long way in creating the optimal substrate for your mushroom babies to grow.
Preparation for the PF Tek Tutorial
In our upcoming tutorial, we will delve into the process of creating 8 BRF (Brown Rice Flour) cakes, a fundamental component in the PF Tek method for mushroom cultivation. We’ll use an innovative and practical approach by using the jars themselves as our unit of measurement. This method is not only straightforward but also allows for easy adjustment of quantities based on how many cakes you plan to produce.
This tutorial is designed to be both accessible for beginners who are just starting their journey in mushroom cultivation and valuable for experienced growers looking to refine their techniques. We’ve tailored this guide to be adaptable and comprehensive, ensuring that all skill levels find it useful.
For your convenience, we’ve provided links to all the necessary materials. To ensure a smooth and uninterrupted experience during this tutorial, we recommend gathering all these materials beforehand. Here’s what you’ll need:
- 6 x 500 ml wide-mouth mason jars
- 6 x modified lids for mushroom growing
- 2 jars of vermiculite
- 1 jar of brown rice flour
- 1 jar of water
- Aluminium foil
- Pressure cooker (stove-top or electric benchtop)
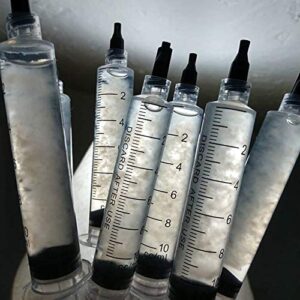
- Liquid culture or spore syringe
By following this tutorial step by step and having these materials at hand, you will be well-equipped to successfully create BRF cakes and embark on your mushroom cultivation journey. Stay tuned for a detailed, engaging, and informative guide that will walk you through each stage of the process.
Step 1. Preparing Modified Lids for Mason Jars
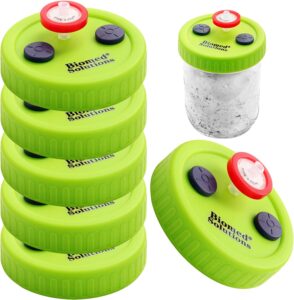
The lid of your mason jar plays a pivotal role in successful mushroom cultivation. It needs to allow for air exchange while keeping contaminants at bay. That’s where our modified lids come in, crafted specifically for mushroom cultivation with built-in filter patches and RTV (Room Temperature Vulcanizing) silicone injection ports.
To make your own, you’ll need mason jar lids, filter patches, RTV silicone, and a drill with an appropriate-sized bit.
1.1. Drill Holes: Start by drilling two holes in your lid – one for the filter patch and one for the injection port. Ensure they are well spaced to avoid any crossover.
1.2. Attach Filter Patch: Next, affix your filter patch over one of the holes. The patch allows fresh air to enter the jar while preventing contaminants from doing so. Use high-heat resistant adhesive to secure the patch.
1.3. Create Injection Port: Apply a blob of RTV silicone over the other hole, creating a self-healing injection port. This will enable you to introduce spores or mycelium into your jar without exposing the interior to open air.
1.4. Dry and Sterilize: Allow the silicone to cure fully before using (usually 24 hours). Before using the lid, sterilize it to eliminate potential contaminants.
While crafting your own lids can be a fun DIY project, it can also be time-consuming and a bit fiddly. If you’re looking for a more convenient option without sacrificing the benefits of a modified lid, consider using our premade lids available at the link below. They are professionally made, ready to use, and have all the features necessary for successful mushroom cultivation.
Remember, the goal is to provide the best environment for your mushrooms to thrive, and using the right lids can make a substantial difference in the success of your cultivation efforts. Choose the method that best suits your needs and capabilities.
Optimized Design: These modified lids are engineered with the mushroom cultivator in mind. They boast filters for fresh air exchange and self-healing injection ports, providing your mycelium with the perfect balance of oxygen and protection.
Versatile Fit: Whether you’re team ‘Wide Mouth’ or ‘Regular Mouth’, these lids have got you covered. Designed to fit both types of mason jars, they ensure a snug, secure seal no matter your jar style preference.
Reusable and Sustainable: Say goodbye to single-use lids! These modified lids are built to last, providing a sustainable option for your mushroom growing needs. Simply sterilize between uses and they’re good as new.
Ideal for Grain Spawn and Liquid Culture: Looking to produce high-quality grain spawn or liquid culture? These lids offer the ideal conditions for your cultures to colonize and thrive, setting the stage for a bountiful harvest.
Simple to Use: These lids are as user-friendly as they come. The self-healing injection ports make inoculation a breeze, and the built-in filters take care of fresh air exchange without any extra effort from you.
Boosted Yields: By providing optimal growing conditions, our reusable modified lids can help enhance the productivity of your mushroom growing setup. Expect healthier mycelium and more abundant harvests!
Step 2. Preparing the BRF Cake Mixture
Now that we’ve gathered our ingredients, let’s dive into the process of making the BRF cake mixture. We’re going to use a straightforward 2:1:1 ratio, using the jars themselves as a measuring unit for simplicity.
-
Combining Vermiculite and BRF: Start by taking four jars full of vermiculite and pour them into a large mixing bowl, spreading them evenly. Next, add two jars of BRF to this bowl. Mix the vermiculite and BRF thoroughly using either your hands or a mixing tool. The mixture should resemble a dry, sandy texture at this point.
-
Adding Water: Now, pour two jars of water into your mixture. Stir the mix well until the water is evenly distributed. It may appear overly wet initially, but don’t worry—vermiculite has excellent water retention properties and will absorb this excess moisture, which is essential for the mycelium’s growth.
-
Achieving Consistency: Continue mixing until you reach a uniform consistency. The ideal substrate will feel like a damp sponge when squeezed, releasing just a few droplets of water. This indicates that you’ve reached the perfect field capacity for your BRF cake mixture.
Congratulations, your BRF cake mixture is now ready! While it might not resemble a traditional cake, for your future mushrooms, it’s a luxurious feast. With the mixture prepared, the next step is to pack it into the jars, setting the stage for successful mycelium colonization. Stay tuned for further instructions on how to proceed with this exciting mushroom cultivation journey!
Understanding Field Capacity: A Critical Component in Mushroom Cultivation
In mushroom cultivation, mastering the concept of ‘field capacity’ in your substrate is crucial for successful growth and fruiting of mycelium. Field capacity refers to the optimum amount of water a substrate can retain after any excess has drained away. This is the ideal state where the substrate is moist but not waterlogged, providing the perfect conditions for mycelium development.
Understanding and achieving field capacity is pivotal in mushroom growing. Given that mushrooms are about 90% water, and mycelium requires a moist environment for growth, getting this balance right is key. If the substrate is too dry, the mycelium might desiccate and cease growing. On the other hand, an overly wet substrate can create an anaerobic (oxygen-poor) environment, which is conducive to harmful bacteria and other competitors, detrimental to mycelium growth.
To determine if your substrate has reached field capacity, the squeeze test is a simple and effective method. After incorporating water into your substrate, take a handful and gently squeeze it. The ideal scenario is when a few drops of water are released – that’s the field capacity. If water streams out, the substrate is too wet and needs more dry material mixed in. If no water comes out, it’s too dry and requires additional moisture.
Achieving the right field capacity is essential for a healthy and hydrated environment for mycelium. It’s a fundamental aspect of mushroom cultivation that, once mastered, can lead to robust mycelial networks and abundant fruiting.
In summary, field capacity is akin to a blueprint for ensuring the well-being and productivity of your mushrooms. It’s a critical factor that should be given ample attention in any mushroom cultivation effort, unlocking the full potential of your fungal projects.
Step 3. Pack & Seal Jars
Filling your mason jars with the brown rice flour and vermiculite mixture is a key step in the PF Tek method of mushroom cultivation. It requires careful attention to ensure the right environment for your mycelium to thrive.
Preparation: Start with your mixture that has reached field capacity. If you’ve followed the earlier steps, your mixture should be moist but not overly saturated. Aim for the ‘Goldilocks’ condition – not too wet, not too dry, but just right.
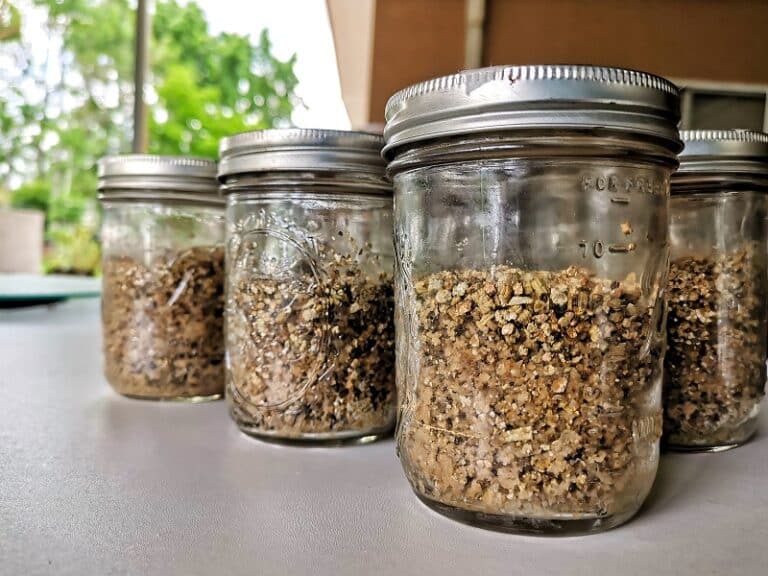
Filling the Jars: Now, take your sterilized mason jars (choose between wide mouth or regular based on your preference) and gently spoon the BRF and vermiculite mixture into them. It’s important to avoid compacting the mixture too tightly in the jars. The goal is to maintain a light, airy texture which provides enough space for the mycelium to grow.
Leaving Space at the Top: Fill the jars to about half an inch below the rim. This space is reserved for a layer of dry vermiculite, which acts as a protective barrier against contamination. Consider this layer as a safeguard, ensuring the cleanliness and safety of your mycelium.
Adding the Dry Vermiculite Layer and Sealing: Once the jars are filled, add a dry layer of vermiculite up to the rim. Then, cap the jars with their modified lids, ensuring the rubber sealing side is facing upwards. Tighten the lids, but not too much – your mycelium needs a breathable environment.
You’ve successfully filled your mason jars! They’re now ready for the next crucial phase: sterilization. Don’t worry if this process feels a bit challenging at first. With practice, you’ll refine your technique and be on your way to successful mushroom cultivation.
Step 4. Sterilizing Your BRF Cakes: A Key Step in Mushroom Cultivation
Now that we’ve filled our mason jars with our carefully prepared BRF substrate,
Sterilizing your mason jars filled with the BRF substrate is an essential step in the PF Tek process. Proper sterilization is crucial for eliminating contaminants that could harm the developing mycelium. Here’s how to effectively carry out this process:
Preparation: Before starting, make sure the lids on your jars are equipped with modified, reusable lids that have self-healing injection ports and air filters. Secure the lids on the jars and cover each one with a layer of aluminum foil. This foil serves as an additional barrier against potential contaminants during the sterilization process.
Steam Sterilization: Use a large pot or a pressure cooker for this step. Fill it with water, ensuring the level reaches about halfway up the sides of your jars. It’s important that the water does not come in contact with the lids of the jars. Place your jars inside the pot or pressure cooker. If you’re using a pressure cooker, follow the specific instructions provided by the manufacturer for steam sterilization.
Cooking Time: Put the pot on the stove and heat it until the water starts to boil. Once boiling, lower the heat to maintain a simmer. If you’re using a regular pot, let the jars steam for at least 90 minutes. For those using a pressure cooker, process the jars at 15 PSI for 60 minutes.
Cooling Down: After sterilization, turn off the heat but leave the jars inside the pot to cool down. This gradual cooling is important to prevent the jars from cracking due to a sudden temperature change. Allow the jars to cool completely, which can take several hours or even overnight. After cooling, your jars are ready for the next step, which is inoculation with spore syringes.
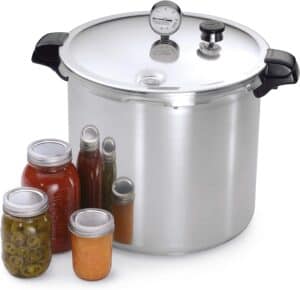
Unlock the full potential of your mushroom cultivation with our Presto 23qt Pressure Canner. This rugged, high-capacity workhorse is just the tool you need for efficient, reliable sterilization of your substrates.
Large Capacity: With a robust 23-quart capacity, our Presto Pressure Canner can handle larger loads, helping you prepare multiple jars of substrate in one go. Now, that’s what we call mushroom efficiency!
Unmatched Sterilization: Sterilization is crucial in mushroom cultivation to ward off contaminants. Our pressure canner ensures thorough, high-temperature sterilization, creating an immaculate environment for your mycelium to thrive.
Built to Last: Durability is the name of the game with the Presto Pressure Canner. Made with high-grade materials, it’s designed to withstand the test of time, serving your mushroom cultivation needs for years to come.
User-Friendly Design: It’s not just powerful, it’s also easy to use! With a simple, intuitive design, even beginners can quickly get to grips with operating our Presto Pressure Canner.
Safety Features: Your safety is paramount to us. Equipped with a pressure dial gauge for precise pressure control and a locking lid system, the Presto Pressure Canner prioritizes safe operation.
Boost your mushroom cultivation efforts with the Presto 23qt Pressure Canner – because when it comes to successful sterilization, we believe in no half measures!
Step 5. Inoculating Your Sterile BRF Cake with Liquid Culture
Inoculating your sterile BRF cakes with mycelium is a critical step in mushroom cultivation. This process, known as inoculation, requires precision and attention to detail to ensure the success of your mushroom growing endeavor. Let’s walk through the steps:
Materials Needed
- Sterile BRF cakes
- A syringe of mushroom liquid culture
- A lighter or alcohol lamp
- A clean cloth or paper towel soaked in isopropyl alcohol
- A sterile environment (like a still air box or a clean, disinfected work surface)
Procedure
5.1. Prepare Your Environment
Start by making your workspace as sterile as possible. This reduces the risk of contamination. If you’re not using a still air box, thoroughly wipe down your work surface and tools with a cloth or paper towel soaked in isopropyl alcohol.
5.2. Sterilize Your Syringe
Shake the syringe containing the liquid culture to evenly distribute the mycelium. Next, use a flame to sterilize the needle of the syringe until it glows red-hot. Let it cool for a few seconds afterwards.
5.3. Inoculation
Find the self-healing injection port on your jar lid. Using the sterilized syringe, carefully inject 1-2ml of liquid culture into the jar through the port. Ensure the needle doesn’t touch any non-sterile surfaces to prevent contamination.
5.4. Repeat the Process
Continue inoculating each of your BRF cakes, flame-sterilizing the needle between each jar. Maintaining cleanliness throughout this process is crucial.
5.5. Store the Jars
After inoculating all your cakes, store them at a temperature appropriate for your mushroom species, usually between 70-75°F. You should expect to see mycelium growth within a week or so.
Congratulations on completing the inoculation process! Patience is now key as you wait for the mycelium to colonize the BRF cakes. Remember, mushroom cultivation is a test of patience, but the results are immensely rewarding. Soon, you’ll be able to witness the fruits of your labor!
Step 6. Unleashing the Mycelium - From Jar to Fruiting Chamber
You’ve reached an exciting milestone in your mushroom cultivation journey: your BRF cakes are fully colonized and ready to transition to the fruiting stage. Let’s walk through the steps to ensure a smooth transfer from jar to fruiting chamber.
6.1. Preparation
Start by thoroughly cleaning your workspace to reduce contamination risks. Have a clean bowl of water and a sterilized surface ready for your colonized cakes, like a disinfected cutting board or tray. Remember, maintaining cleanliness is vital at every stage of mushroom cultivation.
6.2. Cake Removal
With clean hands or gloves, gently unscrew the jar lid. Carefully tap the jar on its side to loosen the cake. Avoid using force to prevent damaging the mycelium network. If the cake doesn’t slide out easily, gently use a sterilized knife or spatula around the edges to assist its release.
6.3. Rinsing and Dunking
Rinse the cake under cold, clean water to remove any loose vermiculite. Then, submerge the cake in your bowl of water. This ‘dunking’ process rehydrates the mycelium, priming it for fruiting. Leave the cakes in the water for 24 hours.
6.4. Rolling in Vermiculite
After dunking, remove the cakes, letting excess water drain. Roll them in dry, sterilized vermiculite. This layer helps retain moisture and can lead to a higher yield.
6.5. Transfer to Fruiting Chamber
Place the cakes in your fruiting chamber, spacing them adequately to accommodate growth. Keep the chamber in a location with minimal direct sunlight, a temperature around 70-75°F (21-24°C), and ensure it has good fresh air exchange.
With these steps, your mushrooms are well on their way to fruiting. Patience is still key as you await the harvest, but you’re now closer than ever to enjoying the fruits of your labor. Keep an eye on your mushroom babies as they embark on this final growth stage!

Step 7. Maintaining BRF Cakes in Fruiting Conditions with a Shotgun Fruiting Chamber
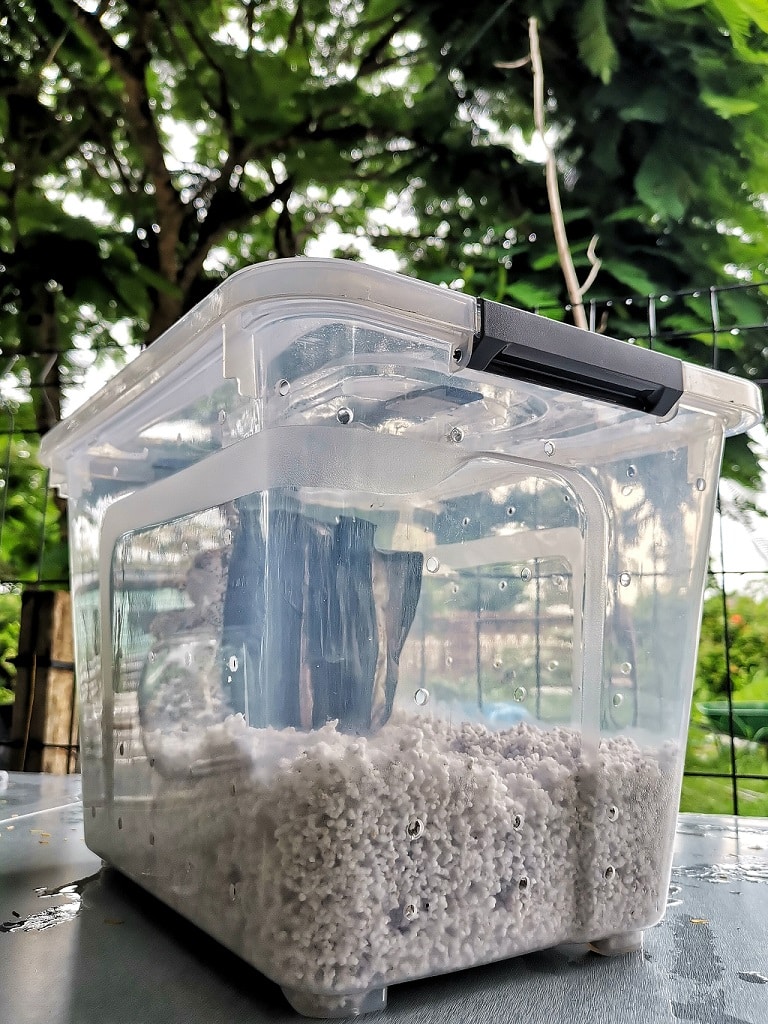
As your BRF cakes are fully colonized and ready after their dunking and rolling in vermiculite, it’s time to move them into their new habitat for fruiting – the Shotgun Fruiting Chamber (SGFC). The SGFC gets its name from the multitude of holes punctured throughout the chamber, resembling the scatter pattern of a shotgun blast. These holes play a vital role in maintaining proper conditions for mushroom fruiting.
7.1. Setting Up the Cakes
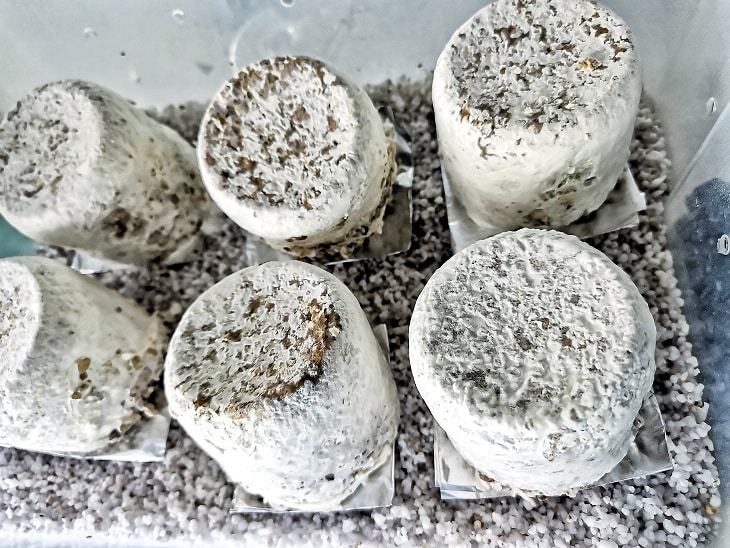
Place the cakes on sterilized lids or small squares of aluminum foil. This step is important to prevent the cakes from sitting directly on the damp perlite layer at the bottom of the chamber. Make sure to space the cakes adequately to ensure good air circulation around each one.
7.2. Misting
Gently spray a mist of water onto the sides of the chamber and lightly over the cakes. The goal is to create a fine, dew-like mist without soaking the cakes. Overwatering can lead to adverse conditions for the mushrooms, so aim for a light and even mist.
7.3. Fanning
Fanning is essential for introducing fresh air into the chamber and should be done at least twice daily, especially after misting. Use the lid of the chamber or a piece of cardboard to gently fan fresh air inside. This process helps to replace the carbon dioxide-heavy air inside the chamber with fresh oxygen, which is vital for inducing the mushrooms to pin (start the initial stage of fruiting).
The design of the SGFC, with its array of holes, naturally facilitates air exchange, which is crucial in simulating the mushrooms’ natural growing conditions. This air exchange is key to removing carbon dioxide and supplying fresh oxygen to your growing mushrooms.
Additionally, the SGFC aids in maintaining high humidity levels, another critical factor for mushroom growth. The damp perlite at the bottom of the chamber slowly releases moisture, helping to keep the humidity within the chamber at an ideal level.
In summary, the SGFC is an efficient and effective way to provide your mushrooms with the balanced environment they need to thrive. It simplifies the process of maintaining the optimal conditions of fresh air exchange and humidity, vital for a successful mushroom yield. With your SGFC set up correctly, you’re well on your way to a bountiful mushroom harvest. Enjoy the fruits of your labor in your very own mushroom zen garden!
The WACOOL Reptile Fogger is a top-tier device designed to provide optimal humidity control for both reptile terrariums and mushroom cultivation chambers. Here’s why it’s an essential tool for hobbyists and professionals:
Integrated Humidity Controller: This isn’t just a humidifier; it’s equipped with a built-in humidity controller. This feature allows for precise setting and maintenance of ideal moisture levels, crucial for the health of your reptiles or the success of your mushroom cultivation.
Generous Water Capacity: With a 4L reservoir, the fogger ensures extended operation without the need for frequent refilling. It’s a convenient set-and-forget solution for maintaining consistent humidity levels.
User-Friendly Setup: Designed for simplicity, the WACOOL Fogger is plug-and-play straight out of the box. Its ease of installation and straightforward instructions ensure quick and hassle-free setup.
Replaceable Humidity Probes: Longevity and accuracy are key, and this device offers both with its replaceable humidity probes. These probes ensure that your environment remains within the optimal humidity range over time.
Top Fill Design: Refilling the reservoir is a breeze thanks to the top-fill design. This feature eliminates the hassle often associated with refilling humidifiers, making maintenance effortless.
Whisper-Quiet Operation: Operating at a low noise level of just 35db, the fogger ensures a peaceful environment. It’s quiet enough not to disturb you, your pets, or the delicate growth of your mushrooms.
The WACOOL Reptile Fogger with its Humidity Controller is an excellent investment for those seeking precision, convenience, and efficiency in humidity management. Whether you’re a dedicated hobbyist or a seasoned professional, this device is sure to elevate your reptile care or mushroom cultivation experience.
Step 8. Harvesting Your Fruited Wonders: When and How to Reap Mushrooms from a BRF Cake
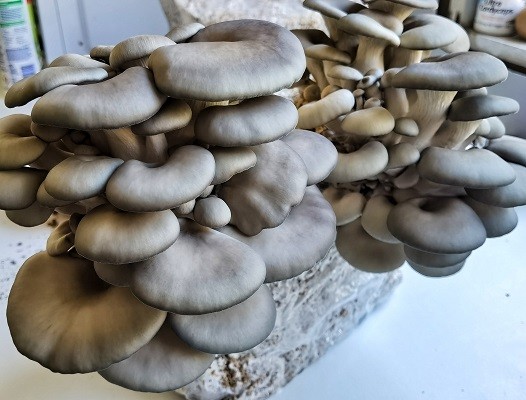
Harvesting your mushrooms at the right time is essential for ensuring their best quality and potency. Typically, this ideal moment occurs just before or as the veil beneath the mushroom cap begins to tear. Here’s a step-by-step guide to help you harvest your mushrooms grown from a BRF cake:
8.1. Sanitize
Start by thoroughly washing and sanitizing your hands with alcohol. Wearing gloves is also a good option. Remember, maintaining cleanliness is crucial in mushroom cultivation.
8.2. Gentle Grasp
Identify mature mushrooms, which are indicated by a flattening or upturning of the cap and a tearing veil. Gently grasp the stem close to the cake. It’s important to handle the mushroom delicately to avoid damaging the underlying mycelium.
8.3. Twist and Pull
With a gentle yet firm grip, twist the stem counter-clockwise and simultaneously pull it upwards. This technique should allow the mushroom to come away from the mycelium network without causing significant damage.
8.4. Repeat
Continue this method for each mature mushroom. Leave the smaller, less mature mushrooms to grow further, unless they are directly under a larger, mature mushroom.
8.5. Post-Harvest Care
After harvesting, inspect the cake to ensure no residual stem bases are left behind. This is to prevent any rot, which could negatively impact future growth.
8.6. Prepare for the Next Flush
Once all mature mushrooms are harvested, it’s time to prepare the BRF cake for the next growth cycle. This typically involves rehydrating the cake to supply the mycelium with the necessary water for growing more mushrooms.
Patience and a gentle approach are crucial during the harvesting process. By carefully observing and handling your mushrooms, you’ll be able to enjoy the fruits of your labor with a bountiful, homegrown mushroom harvest. Happy harvesting!
