Welcome to our comprehensive tutorial on growing Lion’s Mane mushrooms, a guide meticulously crafted for both aspiring mycologists and seasoned mushroom cultivators. Lion’s Mane, scientifically known as Hericium erinaceus, is not only renowned for its unique, shaggy appearance resembling a lion’s mane but also for its numerous health benefits, including enhancing cognitive function and providing neuroprotective effects.
In this step-by-step guide, we will navigate the intricate process of cultivating Lion’s Mane mushrooms, covering essential stages from substrate preparation and inoculation to ideal fruiting conditions and harvest. We’ll delve into the specifics of choosing the right growing medium, creating the perfect environment for mycelium growth, and the best practices for a bountiful harvest.
Our tutorial is tailored to address common challenges in Lion’s Mane mushroom cultivation, offering practical solutions and tips to ensure your success. Whether you’re looking to grow Lion’s Mane mushrooms for their medicinal properties, culinary uses, or simply as a fascinating hobby, this guide will equip you with the knowledge and techniques needed to cultivate these remarkable fungi effectively.
Join us on this mycological adventure as we explore the rewarding process of growing Lion’s Mane mushrooms. With patience, care, and the right approach, you’ll be well on your way to harvesting your own lush, nutritious Lion’s Mane mushrooms at home. Let’s embark on this exciting journey together!
Meet the Fungal King: Lion's Mane
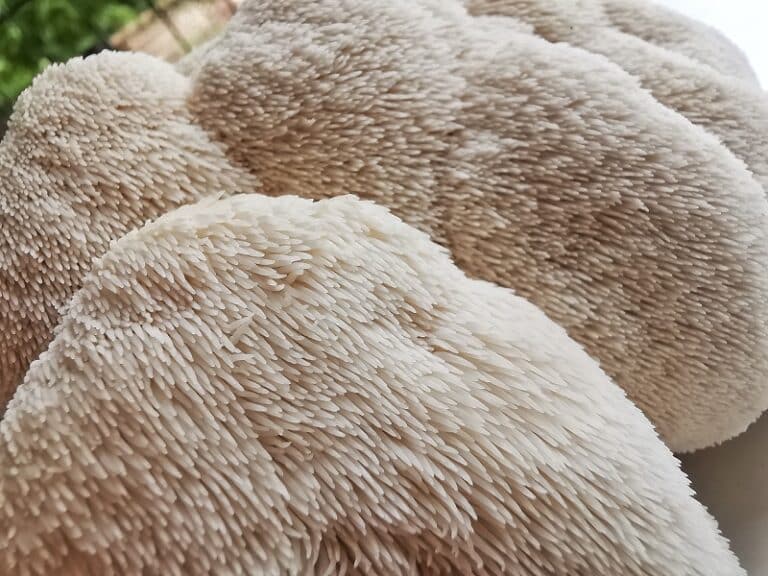
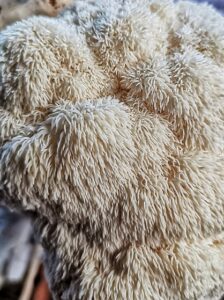
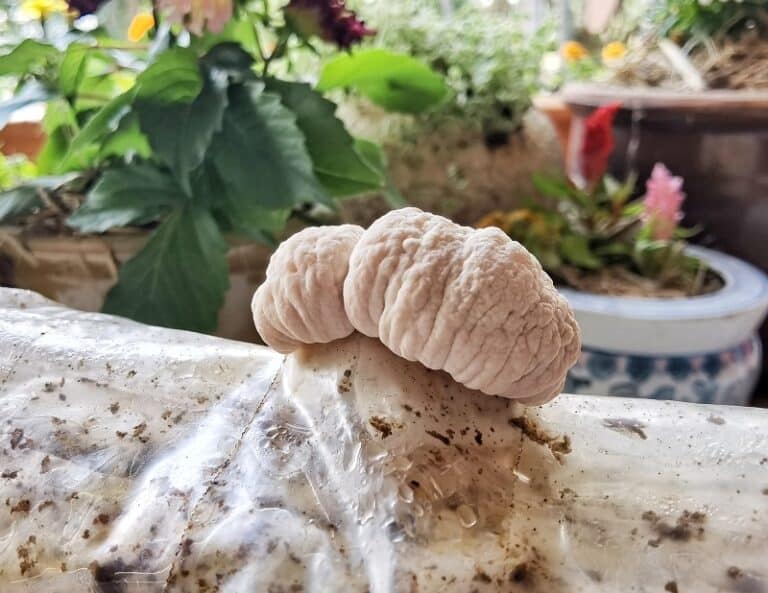
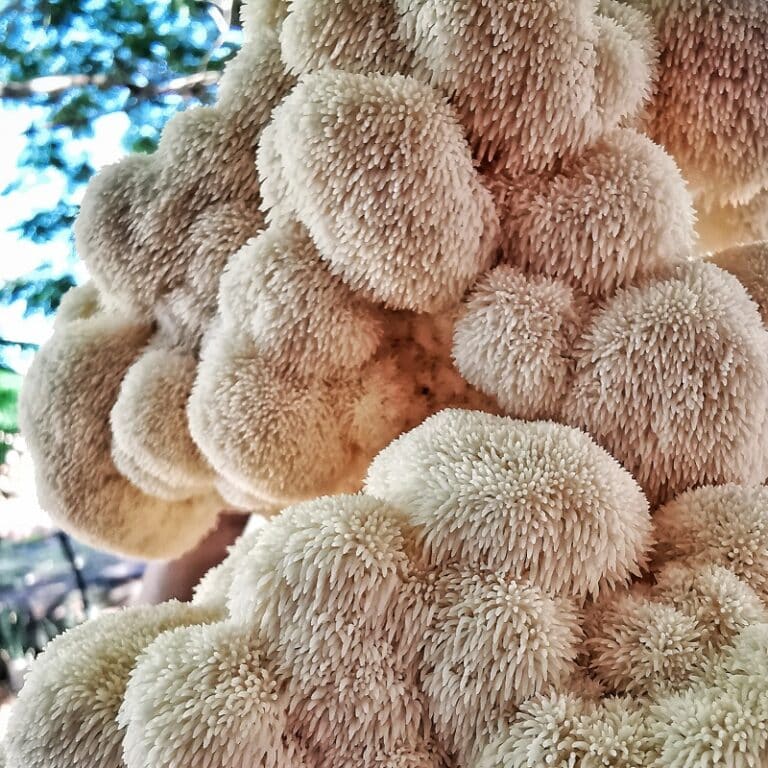
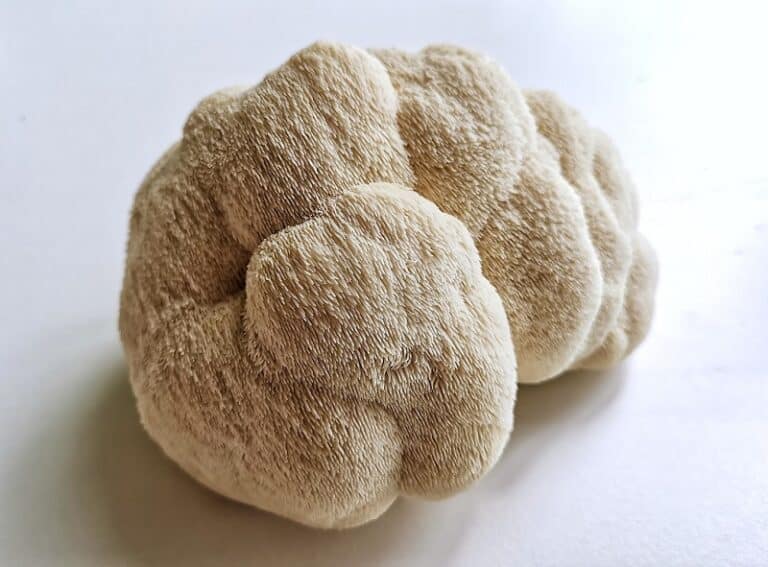
Lion’s mane is not your average fungi. As its name suggests, this gourmet mushroom sports a unique, cascading icicle-like appearance that resembles a shaggy white lion’s mane, making it the Aslan of the mushroom world. Its scientific name, Hericium erinaceus, may not roll off the tongue quite as smoothly, but it’s part of the fun(gi) facts you’re likely to acquire as a mushroom aficionado.
Now, don’t be fooled by the wild, majestic exterior of lion’s mane. On the inside, it’s quite the softie! This unique mushroom boasts a soft, tender texture when cooked that’s often likened to seafood like crab or lobster. Add to that a slightly sweet, delicate flavor, and it’s no wonder this shroom has roared its way into the hearts of gourmet cooks and mushroom cultivators worldwide.
And let’s not forget about its cerebral side. Yes, lion’s mane is the smarty pants of the mushroom world. It’s prized not just for its epicurean delights but also for its array of health benefits. Lion’s mane is revered for its potential neuroprotective properties. Some studies have suggested that it might support nerve growth and have a positive impact on cognitive health.
In essence, lion’s mane is the whole package – a sumptuous flavor, an unruly but charming aesthetic, and a brain to boot! That’s enough to make anyone “paws” and take notice, wouldn’t you agree? Now, let’s continue our fungal safari and discover how to cultivate this regal mushroom at home!
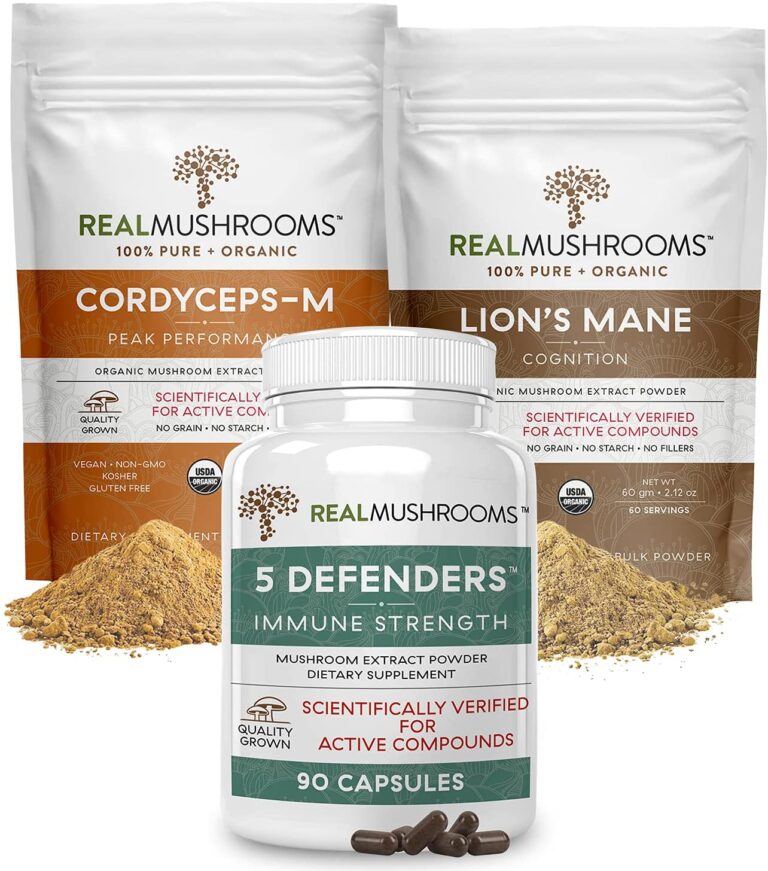
100% Pure Lions Mane Extract: Unlike most other mushroom supplement brands in the market that use mycelium (mushroom root system grown on grain), Real Mushrooms’ lions mane extract powder is made from 100% real mushroom, handpicked by experts with over 40 years of mushroom growing experience. This ensures that all our lions mane supplements contain no fillers, no grains, and no additives
Health Benefits Of Lion's Mane
Lion’s Mane mushrooms are often appreciated for their distinctive, seafood-like taste and texture. Still, they also bring a broad array of potential health benefits to the table, making them a standout in the gourmet mushroom sector. Let’s dive deeper into what this unique mushroom might do for your health.
Neuroprotective Properties: Perhaps the most celebrated aspect of lion’s mane mushroom’s health potential is its neuroprotective qualities. Various scientific studies suggest that this mushroom may stimulate the production of nerve growth factor (NGF) – a protein that promotes the growth and normal function of nerve cells. This has sparked interest in lion’s mane as a potential natural supplement for cognitive health, potentially aiding memory, focus, and overall mental clarity.
Antioxidant Powerhouse: Lion’s mane mushrooms are also known for their high antioxidant content. Antioxidants help to combat oxidative stress in the body, which can lead to various chronic diseases and premature aging.
Immune Support: Preliminary research suggests that the beta-glucan polysaccharides found in lion’s mane mushrooms might have immunomodulatory effects. This means they could help regulate and support a healthy immune response.
Gastrointestinal Health: Lion’s mane has a long history of use in traditional medicine for supporting digestive health. It’s believed to help protect the mucous membranes of the gut, potentially aiding in the management of conditions like gastritis.
Mood and Anxiety: Emerging research indicates lion’s mane may help reduce depression and anxiety symptoms. However, more human trials are needed to fully understand this effect.
Please note, while these potential health benefits are encouraging, more research, especially large-scale human trials, are needed to confirm these effects. Always consult with a healthcare provider before starting any new supplement regimen.
So, lion’s mane is more than just a gourmet delight. With potential benefits that touch upon brain health, digestion, and immunity, this mushroom truly stands as a king in the wellness landscape. Now, let’s look at how we can cultivate this beneficial and delicious mushroom at home.
Today's Best Prices On Lion's Mane Supplements
Getting Started
Now that we’ve acquainted ourselves with the lion’s mane mushroom, it’s time to get our hands dirty (or should I say, spore-y?). In the following tutorial, we will be guiding you step by step on how to make lion’s mane fruiting blocks.
These fruiting blocks will weigh approximately 2.5kg, or around 5 pounds each. For the uninitiated, a fruiting block is essentially a bag full of a nutritious substrate where our lion’s mane mycelium will grow and eventually bear fruit – or in our case, fabulous fungal forms!
Now, it’s worth mentioning that using specially designed mushroom grow bags is strongly recommended for the success of this tutorial. These bags are designed to create an optimal environment for your fungi friends to thrive, complete with breathability and temperature stability. This ensures our mycelium stays healthy, happy, and, most importantly, prolific.
You might be wondering where to fetch these mushroom grow bags and other materials needed for this tutorial. Well, fret not, my mycelium-mad mates! We’ve got you covered. Below, you’ll find a list of everything you need, complete with links for easy shopping. Grab your supplies and get ready to enter the magical world of mushroom cultivation. Your fungal Mufasa awaits!
Materials
- Pressure Cooker
- Filter Patch Grow Bags <–Order Here–>
- Kitchen Scales
- 450 grams Soy Hulls
- 450 grams Hardwood Fuel Pellets (HWFP)
- 1.4 Litres Water
- Torch
- Metal Spoon
- Alchohol (Isopropyl or Methylated Spirits)
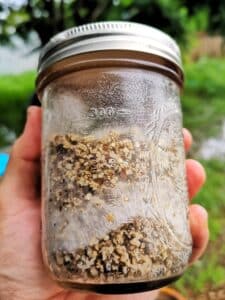
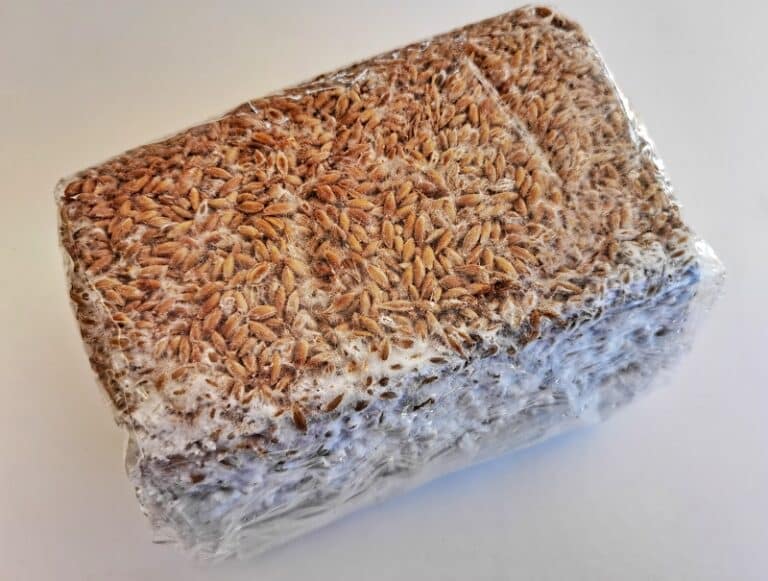
- Lion’s Mane Grain Spawn

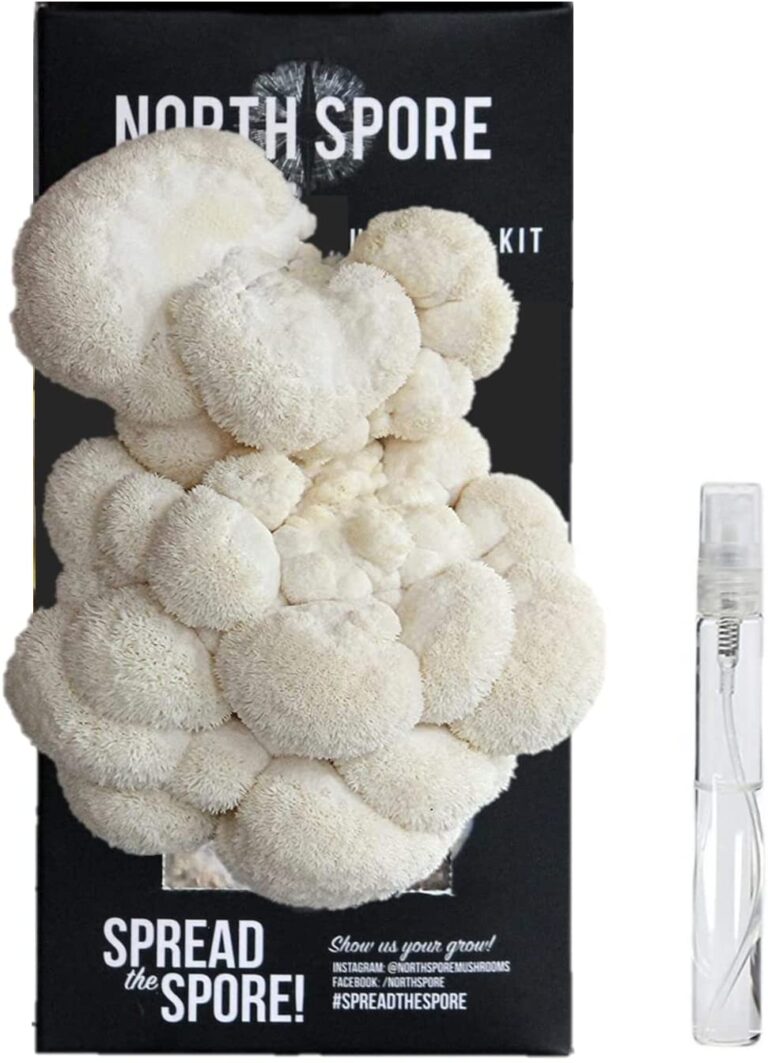
Ready to unleash the lion within? These Lion’s Mane Ready-to-Grow Mushroom Kit is your passport to homegrown gourmet goodness! With this kit, you’ll be cultivating your very own batch of delicious, brain-boosting lion’s mane mushrooms in no time.
Ideal for beginners and seasoned mushroom tamers alike, a kit simplifies the process, ensuring that you’re just a few easy steps away from a plentiful harvest. Experience the satisfaction of watching these majestic, maned mushrooms sprout right before your eyes, bringing the wilderness into your home.
So why wait? Embrace the gourmet grower in you and unleash the delicious potential of lion’s mane mushrooms today. Roar your way to healthful, hearty, homegrown harvests with a Lion’s Mane Ready-to-Grow Mushroom Kit. Let’s make some mane magic together!
Step 1. Prepare Substrate
Let’s embark on the initial step of our mushroom cultivation journey – preparing the substrate mixture. The substrate serves as the food for our lion’s mane mycelium, providing them with the necessary nutrients to grow and eventually bear fruit. For this purpose, we’ll be using a mixture of soy hulls and hardwood fuel pellets. This combination is often referred to as a “Master’s Mix,” renowned for its success in growing a wide variety of gourmet mushrooms.
Here’s how to create the substrate mixture:
Materials:
- 450g Soy Hulls
- 450g Hardwood Fuel Pellets
- 1.4L Water
Procedure:
1.1. Start by measuring out 450g of soy hulls and 450g of hardwood fuel pellets. These quantities will provide the ideal nutrient balance for our lion’s mane mushrooms.
1.2. Combine the soy hulls and hardwood fuel pellets in a large mixing container.
1.3. Slowly add 1.4L of water to the mixture. As you add the water, make sure to stir the mixture well to ensure all components are thoroughly soaked. The water will help the materials to break down and will also provide the moisture needed for the mycelium to grow.
Remember, patience is key during this step. The mixing process ensures that the water is evenly distributed throughout the substrate, providing the optimal environment for your lion’s mane mushrooms to thrive.
This mixture will form the base for our 2.5kg fruiting blocks, a foundation upon which our lion’s mane will grow. Now, with our substrate prepared, we’re ready to move on to the next step – pasteurizing our substrate! Stay tuned.

Step 2. Filling & Folding The Mushroom Grow Bag
With our substrate mixture prepared, we now proceed to the next step of our lion’s mane cultivation process – filling the mushroom grow bag. This step is crucial as it ensures that our substrate is properly contained, creating an ideal environment for our lion’s mane mycelium to colonize and grow.
Materials:
- Mushroom Grow Bag
- Prepared Substrate Mixture
- Small Piece of Tape
Procedure:
2.1. Begin by opening your mushroom grow bag. Ensure the interior is clean and free of any debris.
2.2. Carefully pour your substrate mixture into the bag. Be cautious to avoid spilling; a funnel can be useful for this task if needed.
2.3. Once the bag is filled, compress the substrate by applying even pressure throughout the bag. The goal here is to remove any excess air that could potentially hinder the growth of our mycelium.
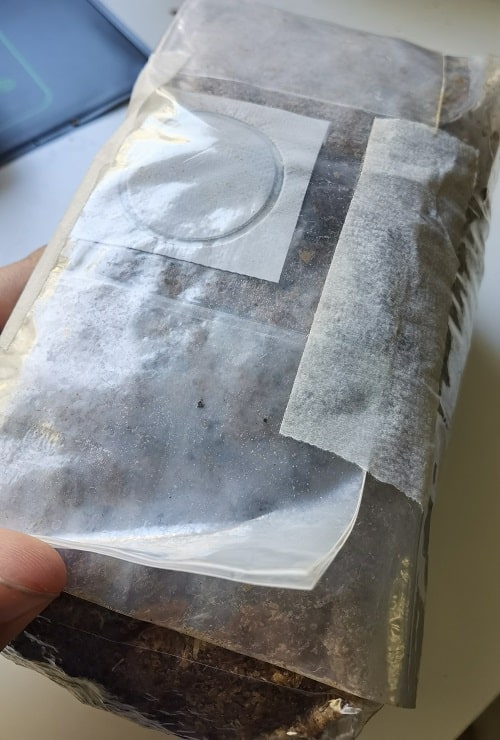
2.4. After the bag is compressed and the air is expelled, fold the top of the bag tightly. This step is key as it prevents unwanted contaminants from entering the bag during the sterilization process.
2.5. To hold the fold in place, apply a small piece of tape. This will prevent the bag from unfolding during the upcoming steps.
It’s important to note that the bag will self-seal once sterilized. This serves as a line of defense against any potential contamination and ensures our lion’s mane mushrooms have the best environment in which to grow.
With our mushroom grow bag properly filled and sealed, we’re ready to proceed to the next crucial step: sterilizing our substrate. Stay tuned for the next installment, where we’ll walk you through this critical process.
Step 3. Sterilise Grow Bags
Now that our mushroom grow bags are filled with the substrate, we are ready to move on to the sterilisation stage. This process is pivotal in our mushroom cultivation journey as it helps to kill any potential contaminants that might interfere with our lion’s mane mycelium’s growth.
Materials:
- Filled Mushroom Grow Bags
- Pressure Canner or Cooker
Procedure:
3.1. Start by arranging your filled mushroom grow bags inside your pressure canner or cooker. You may need to adjust the number of bags depending on the size of your cooker. Ensure the bags are evenly distributed and the cooker isn’t overcrowded; adequate space allows for effective sterilisation.
3.2. Once the bags are arranged, close the lid of the pressure canner or cooker and lock it into place. Make sure the vent pipe (also known as the steam release valve) is open at this stage.
3.3. Set your pressure canner or cooker to a high heat setting. Once steam begins to vent from the open vent pipe, allow it to escape for about 10 minutes. This ensures that the air is completely purged from the canner.
3.4. After venting, close the vent pipe and allow the pressure to build to 15 psi (pounds per square inch). Once the desired pressure is reached, reduce the heat to maintain this level and start your timer for 90 minutes.
3.5. After the 90-minute sterilisation process, turn off the heat and allow the pressure canner or cooker to cool down and depressurise naturally. Do not attempt to open the canner or cooker until the pressure has dropped to zero. This could take a few hours, so patience is key.
Remember, safety is paramount during this step. Always handle the pressure canner or cooker according to the manufacturer’s instructions to avoid accidents.
Now, with our substrate sterilised, we’re ready to move on to the exciting stage of inoculating our substrate with lion’s mane spawn! Stay tuned as we delve into the core of mushroom cultivation.
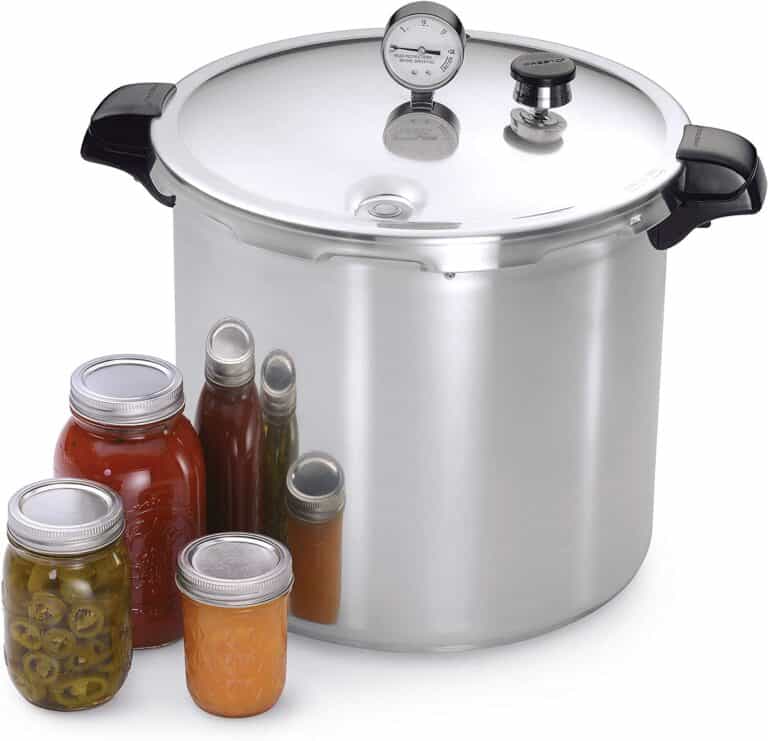
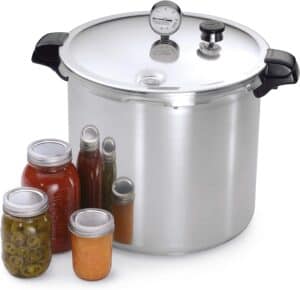
Unlock the full potential of your mushroom cultivation with our Presto 23qt Pressure Canner. This rugged, high-capacity workhorse is just the tool you need for efficient, reliable sterilization of your substrates.
Large Capacity: With a robust 23-quart capacity, our Presto Pressure Canner can handle larger loads, helping you prepare multiple jars of substrate in one go. Now, that’s what we call mushroom efficiency!
Unmatched Sterilization: Sterilization is crucial in mushroom cultivation to ward off contaminants. Our pressure canner ensures thorough, high-temperature sterilization, creating an immaculate environment for your mycelium to thrive.
Built to Last: Durability is the name of the game with the Presto Pressure Canner. Made with high-grade materials, it’s designed to withstand the test of time, serving your mushroom cultivation needs for years to come.
User-Friendly Design: It’s not just powerful, it’s also easy to use! With a simple, intuitive design, even beginners can quickly get to grips with operating our Presto Pressure Canner.
Safety Features: Your safety is paramount to us. Equipped with a pressure dial gauge for precise pressure control and a locking lid system, the Presto Pressure Canner prioritizes safe operation.
Boost your mushroom cultivation efforts with the Presto 23qt Pressure Canner – because when it comes to successful sterilization, we believe in no half measures!
Step 4. Inoculate The Sterile Substrate
Having successfully sterilised our substrate, we’re now ready to introduce our lion’s mane mycelium to its new home. In this step, we will inoculate our substrate with a live mycelium inoculant, using either agar or a liquid culture. This stage is where the real magic of mushroom cultivation begins.
However, it’s crucial to mention that this step must be conducted with utmost care to prevent contamination. It’s strongly recommended to use a laminar flow hood for this process, although a Still Air Box (SAB) may be used as an alternative.
Materials:
- Sterile Mushroom Grow Bags with Substrate
- Live Mycelium Inoculant (Agar or Liquid Culture)
- Laminar Flow Hood or Still Air Box (SAB)
- Sterilised Inoculation Tools
Procedure:
4.1. Begin by setting up your workspace. Clean your laminar flow hood or SAB thoroughly and ensure your inoculation tools are sterilised.
4.2. If using a laminar flow hood, turn it on and allow it to run for a few minutes to clear the air.
4.3. Carefully open your mushroom grow bag inside your laminar flow hood or SAB. Make sure not to touch the inside of the bag or the substrate to prevent contamination.
4.4. Gently introduce the mycelium inoculant to the substrate. If using agar, this will mean transferring a piece of the colonised agar to the bag. If using a liquid culture, it will mean injecting the culture into the bag. Make sure to spread the inoculant evenly across the substrate to encourage uniform colonisation.
4.5. Once the inoculant has been introduced, reseal the bag as per the manufacturer’s instructions.
4.6. Finally, give the bag a gentle shake to distribute the mycelium inoculant evenly throughout the substrate.
Remember, maintaining sterility is crucial during this step, as any contamination could hamper the growth of your lion’s mane mushrooms. It’s also essential to handle your mycelium with care, as rough handling could damage it.
Now that we’ve successfully inoculated our substrate, it’s time to wait and watch our mycelium grow! In our next step, we’ll discuss the ideal conditions for incubation and fruiting. Stay tuned!
Mastering Aseptic Technique: The Key to Successful Mushroom Cultivation
In the world of mushroom cultivation, practicing good aseptic technique is paramount. This means creating an environment that’s as free from microbial contamination as possible when we are handling our mushroom cultures, substrate, and tools. The goal is to provide an ideal environment for our lion’s mane mycelium to grow while preventing the introduction of competing microorganisms.
So, what does aseptic technique look like in practice?
Clean Workspace: It begins with a clean workspace. Your cultivation area should be cleaned thoroughly before starting any work. This includes wiping down surfaces with a 10% bleach solution or another suitable disinfectant.
Personal Hygiene: You should also take care of personal hygiene. This includes washing your hands thoroughly and wearing clean clothes. It’s also recommended to wear gloves and a mask.
Sterile Tools: All tools used during the process need to be sterilised before use. This can be done through various methods such as autoclaving, boiling, or soaking in a suitable disinfectant.
Laminar Flow Hood or SAB: Aseptic technique is best maintained within a sterile airflow, such as that provided by a laminar flow hood, or in a still air environment like a Still Air Box (SAB). These devices provide a clean space to work in and help to prevent airborne contaminants.
Careful Handling: Be mindful when opening bags or containers of sterilised substrate or when transferring mycelium. Swift and confident movements can help reduce the chance of introducing contaminants.
Remember, even the most diligent aseptic technique cannot guarantee a 100% sterile environment, but it significantly reduces the risk of contamination. A small contamination in the early stages can have major implications on the overall yield, quality, and safety of your mushroom harvest, making aseptic technique a vital skill in the toolbox of any mushroom cultivator.
Step 5. Incubate & Colonise
With our substrate now inoculated, we move onto a critical phase of mushroom cultivation that involves patience and observation: the incubation and colonisation stage. At this juncture, our mushroom grow bags will be resealed and left undisturbed to allow the mycelium to fully colonise the substrate.
Materials:
- Inoculated Mushroom Grow Bag
- Incubation Space
Procedure:
5.1. Once your mycelium has been inoculated and distributed evenly within the bag, it’s time to reseal the bag. Make sure the seal is secure to maintain the sterile environment inside.
5.2. After resealing, move the inoculated bag to your chosen incubation space. This area should be clean, dark, and maintain a consistent temperature of around 20-24°C (68-75°F) which is optimal for lion’s mane mycelium to grow.
5.3. Now, it’s a waiting game. Leave the bag undisturbed to allow the mycelium to fully colonise the substrate. This can take anywhere from 2-4 weeks. Patience is key during this stage.
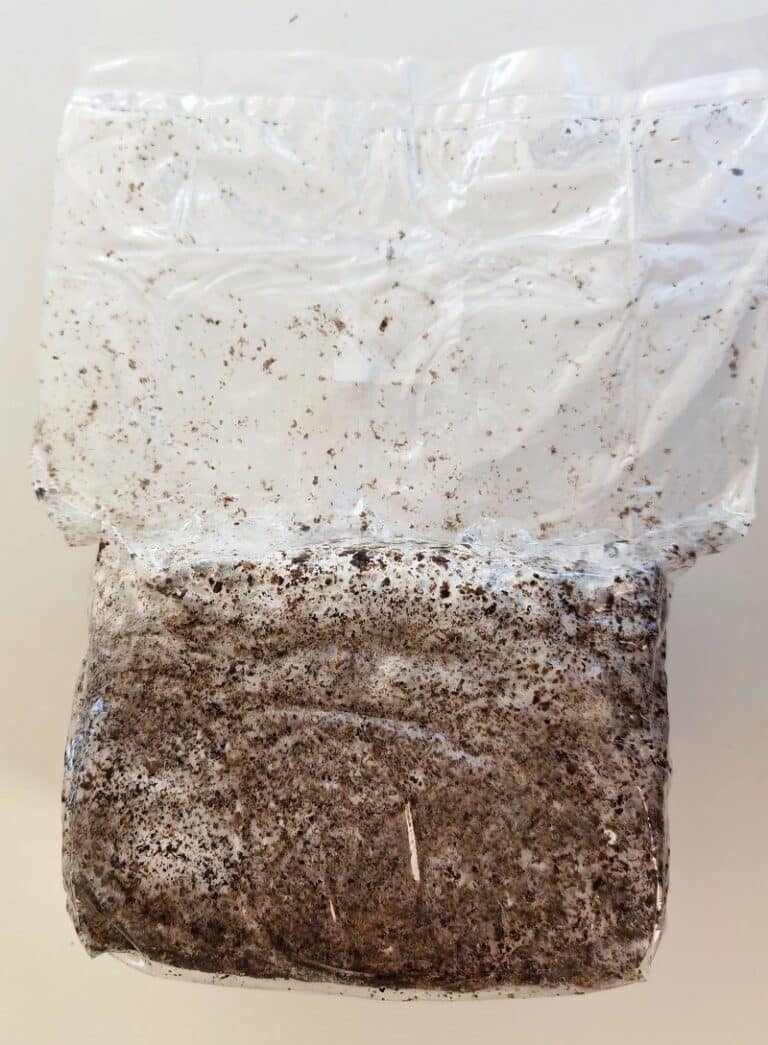
5.4. During this period, monitor the bag for signs of mycelial growth, which will appear as white, fuzzy patches throughout the substrate. It’s also essential to keep an eye out for any potential contaminants, which may appear as moulds of different colours.
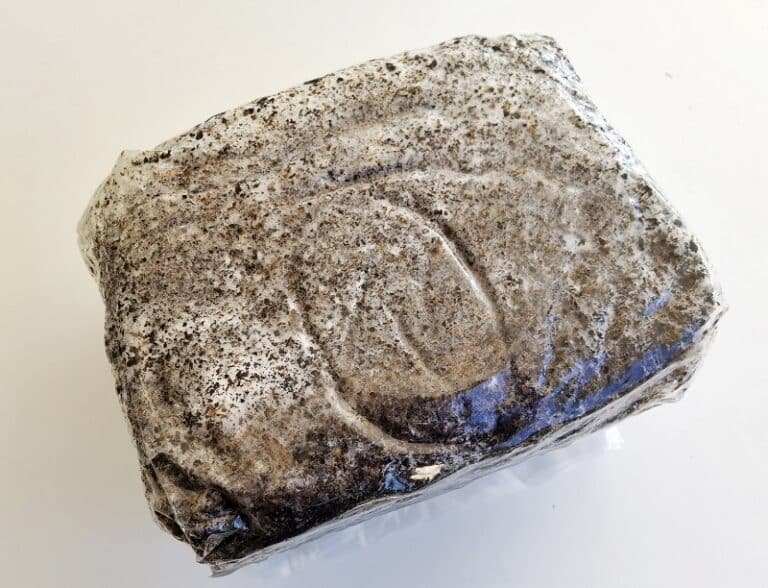
Remember, this phase is crucial as it sets the stage for the fruiting process, where our lion’s mane mushrooms will start to form. Once the substrate is fully colonised (it will look completely white), you can then move onto the fruiting stage which we will discuss in the next step.
Step 6. Opening The Grow Bag
With our patience rewarded, we’re now ready to proceed to the next exciting phase of our mushroom cultivation journey. In this step, we will identify a fully colonised lion’s mane grow bag and move it into a fruiting chamber, marking the beginning of the mushroom fruiting stage.
Materials:
- Fully Colonised Mushroom Grow Bag
- Fruiting Chamber
Procedure:
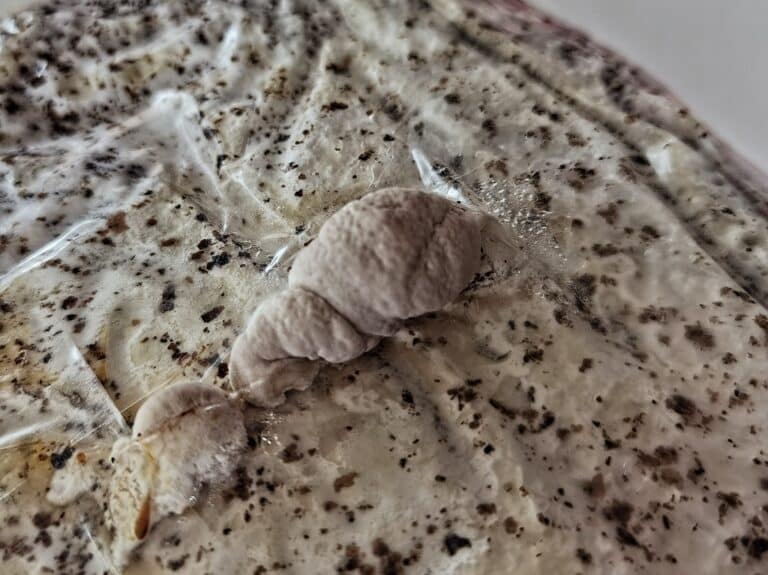
6.1. First, identify a fully colonised bag. It will appear entirely white and fluffy, indicating the mycelium has fully permeated the substrate. This process usually takes 2-4 weeks post-inoculation.
6.2. Once you’ve identified a fully colonised bag, carefully open the bag. Be sure to do this in a clean area to prevent any potential contamination.
6.3. Now, gently remove the colonised substrate block from the bag. It’s recommended to handle the block gently to avoid damaging the mycelium.
6.4. After removal, place the colonised substrate block into your fruiting chamber. This is a special environment where conditions are controlled to promote the growth of mushroom fruits.
Remember that the fruiting chamber should have conditions conducive to mushroom fruiting – high humidity (around 95%), adequate fresh air exchange, and indirect light. It’s also recommended to mist and fan the chamber daily to maintain appropriate moisture and air exchange.
With our colonised substrate block now in the fruiting chamber, we’re on the verge of witnessing the growth of our very own lion’s mane mushrooms. In the next step, we’ll discuss how to monitor and care for our growing mushrooms to ensure a successful harvest. Stay tuned, the fruiting finale is almost upon us!
Options for Fruiting Chambers: From Low Cost to Semi-Automated
When it comes to setting up your fruiting chamber, there are various options available to suit different needs and budgets. Whether you’re just starting out in mushroom cultivation and looking for a low-cost solution, or you’re a more experienced grower in search of a semi-automated system, there’s a fruiting chamber for you.
Low-Cost Fruiting Chambers:
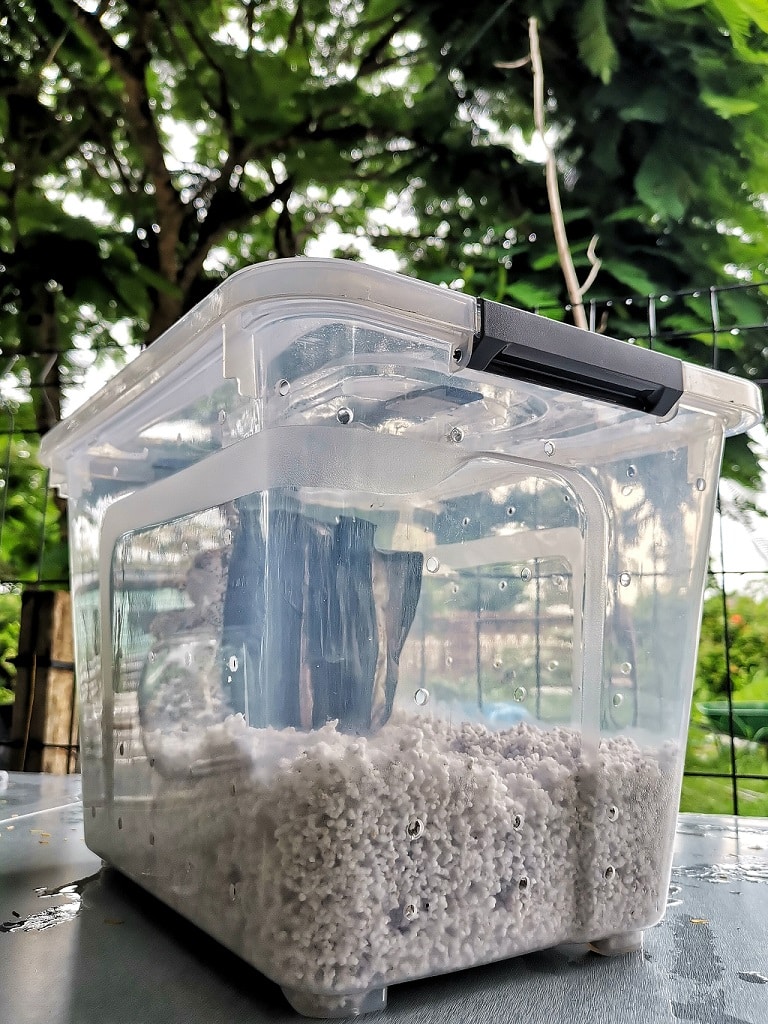
Shotgun Fruiting Chamber (SGFC): A popular choice for beginners, the SGFC is essentially a large clear plastic tote with numerous holes drilled into all six sides to allow for fresh air exchange. It’s filled with damp perlite, which helps maintain high humidity levels. It’s cost-effective, easy to set up, and can yield good results with regular misting and fanning.
MonoTub: Another low-cost option, the MonoTub involves a larger clear plastic tote but with fewer holes, usually covered with micropore tape or polyfill to allow for controlled air exchange. The tub’s large size is ideal for growing multiple mushroom blocks, and its closed system design helps maintain high humidity levels. It requires minimal maintenance once dialed in.
Semi-Automated Fruiting Chambers:
Martha Tent: Named after the Martha Stewart brand of greenhouse, this set up involves a portable greenhouse with shelves. Combined with an ultrasonic humidifier and a fan on a timer for fresh air exchange, this set up can allow you to grow multiple mushroom blocks at once with less daily maintenance.
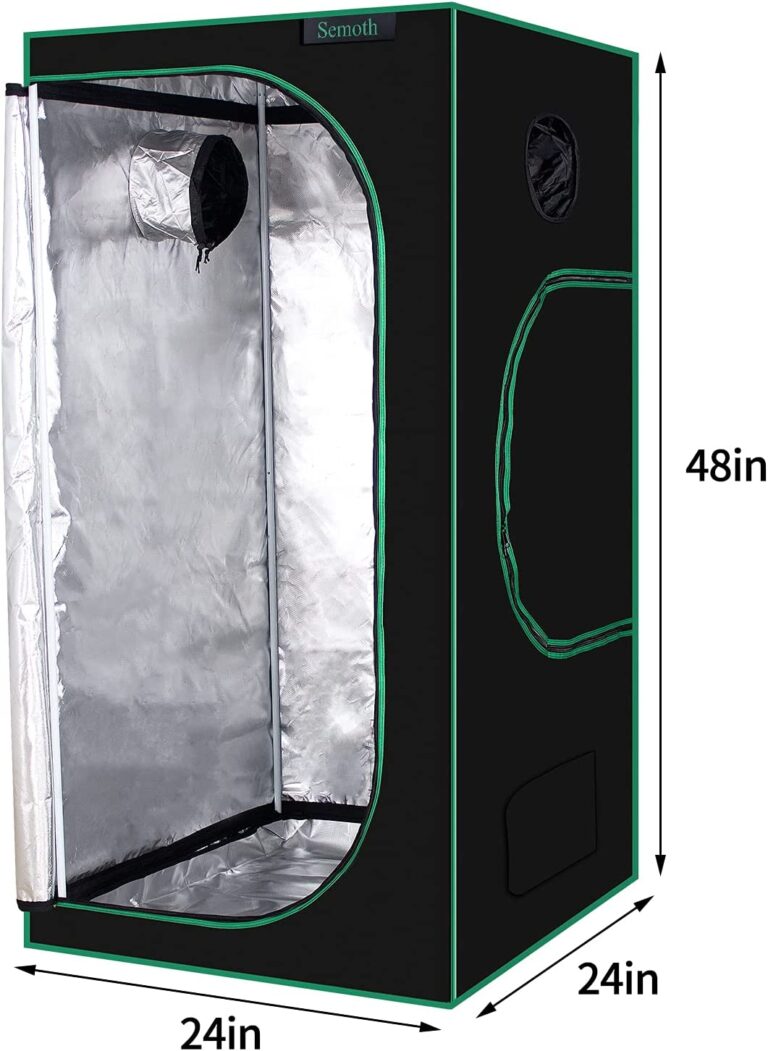
Automated Grow Tents: A more sophisticated set up, these include a grow tent equipped with automated systems for humidity and fresh air exchange. Often these systems use a humidifier connected to a hygrometer to maintain precise humidity levels, and an automated exhaust fan for air exchange. While this option requires a higher initial investment, it provides a highly controlled environment for mushroom growth and can save a lot of time and effort in the long run.
Remember, regardless of the type of fruiting chamber you choose, the important thing is that it allows for high humidity, fresh air exchange, and indirect light – all critical factors for fruiting your lion’s mane mushrooms successfully. Happy growing!
Greenhouse Fruiting Chambers
Using A Humidifier
Keeping mushrooms humid is key to ensuring consistent yields. A humidifier will ensure that the fruiting chamber has ample humidity to ensure consistently impressive yields. Learn more about maintaining humidity in our online guide.
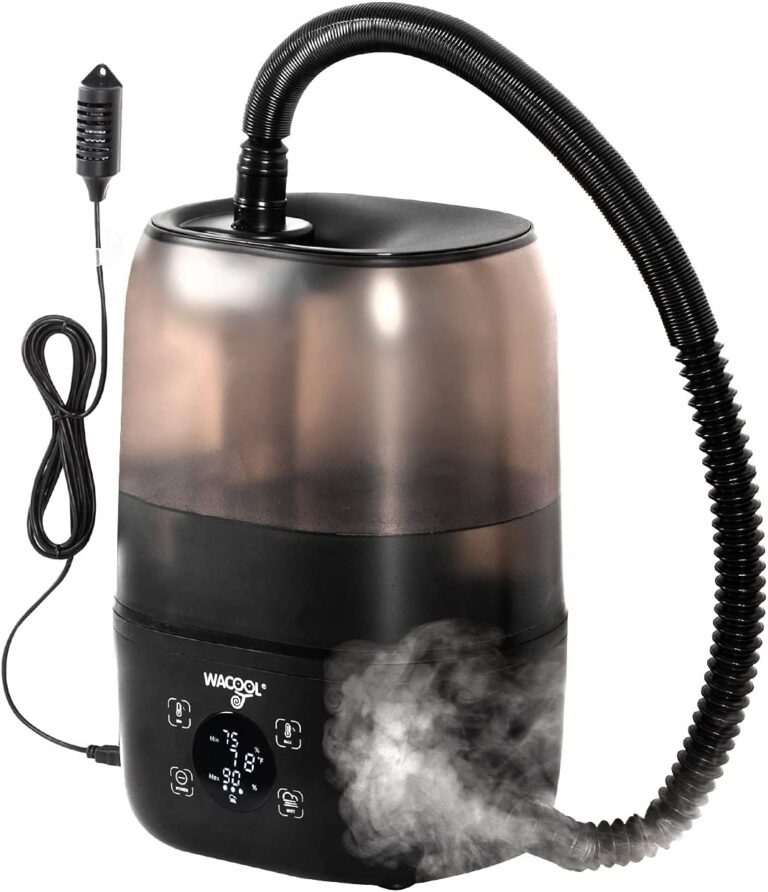
Take complete control of your terrarium’s climate with our WACOOL Reptile Fogger, a premium device designed to simplify your reptile or mushroom cultivation care routine. Here’s why it’s a must-have:
Integrated Humidity Controller: Our fogger is not just a humidifier. It comes with a built-in humidity controller, offering you the ultimate precision in setting and maintaining the perfect moisture level for your pets or mycelium.
Generous Capacity: With a 4L water reservoir, our WACOOL Reptile Fogger offers all-day operation. No need for frequent refills, just set it and forget it!
Effortless Setup: Plug & play straight from the box, no complex installation required. With easy-to-follow instructions, you’ll have it up and running faster than a gecko can do a wall-run.
Replaceable Humidity Probes: Our device comes with replaceable humidity probes for longevity and accuracy, giving you peace of mind and ensuring your terrarium or grow chamber stays in the perfect climatic zone.
Top Fill Convenience: Tired of tricky refills? Our device features a convenient top-fill design, making the refill process as easy as a summer breeze.
Whisper-Quiet Operation: The WACOOL Reptile Fogger operates at a low 35db, ensuring it won’t disturb your tranquility or the peaceful environment of your pets or mushroom babies.
The WACOOL Reptile Fogger with Humidity Controller combines convenience, precision, and longevity, making it an excellent choice for hobbyists and professionals alike. Invest in yours today and experience the WACOOL difference!
Step 7. Harvesting Your Lion's Mane Fruiting Bodies
The fruiting finale has finally arrived! After weeks of patient cultivation, your lion’s mane mushrooms are ripe for the picking. In this step, we will guide you on how to properly harvest the mature lion’s mane fruiting bodies.
Materials:
- Sharp, Clean Knife or Scissors
Procedure:
7.1. First, you’ll need to identify when your lion’s mane is ready to be harvested. Mature fruiting bodies will be large, with a voluminous, shaggy appearance that resembles a white or cream-colored mane (hence the name). You’ll want to harvest before the tips of the ‘teeth’ start to brown.
7.2. To harvest your mature lion’s mane mushrooms, you will need a sharp, clean knife or pair of scissors. Sterilise your chosen tool before you begin to maintain a clean environment.
7.3. Cut the lion’s mane mushroom at the base, as close to the substrate as possible, being careful not to damage the mycelium. Handle the mushroom gently to avoid bruising.
7.4. After harvesting, store your lion’s mane mushrooms in a paper bag inside the refrigerator. They should be used relatively soon after harvesting, as their freshness and taste will degrade over time.
Remember, harvesting your mushrooms is the grand finale of your cultivation journey. Treat it as a celebration of the hard work, care, and patience you’ve put into the process. Once harvested, your lion’s mane mushrooms are ready to be savored in your favorite recipes!
Congratulations on your successful harvest. Happy growing and even happier eating!
